System Configuration
Remember to click on Save at the bottom of the screen when you finish each item, when needed.
Areas of Studies
The Area of Study is a category or field in which students focus their academic and internship pursuits. At least one Area of Study is required. Since different schools/districts have different names for it, you can configure the name first. Some schools/districts call them Academies, Pathways, Tracks, Concentrations, etc. You will need to configure the singular and plural name for it first by going to Configure > Area of Studies
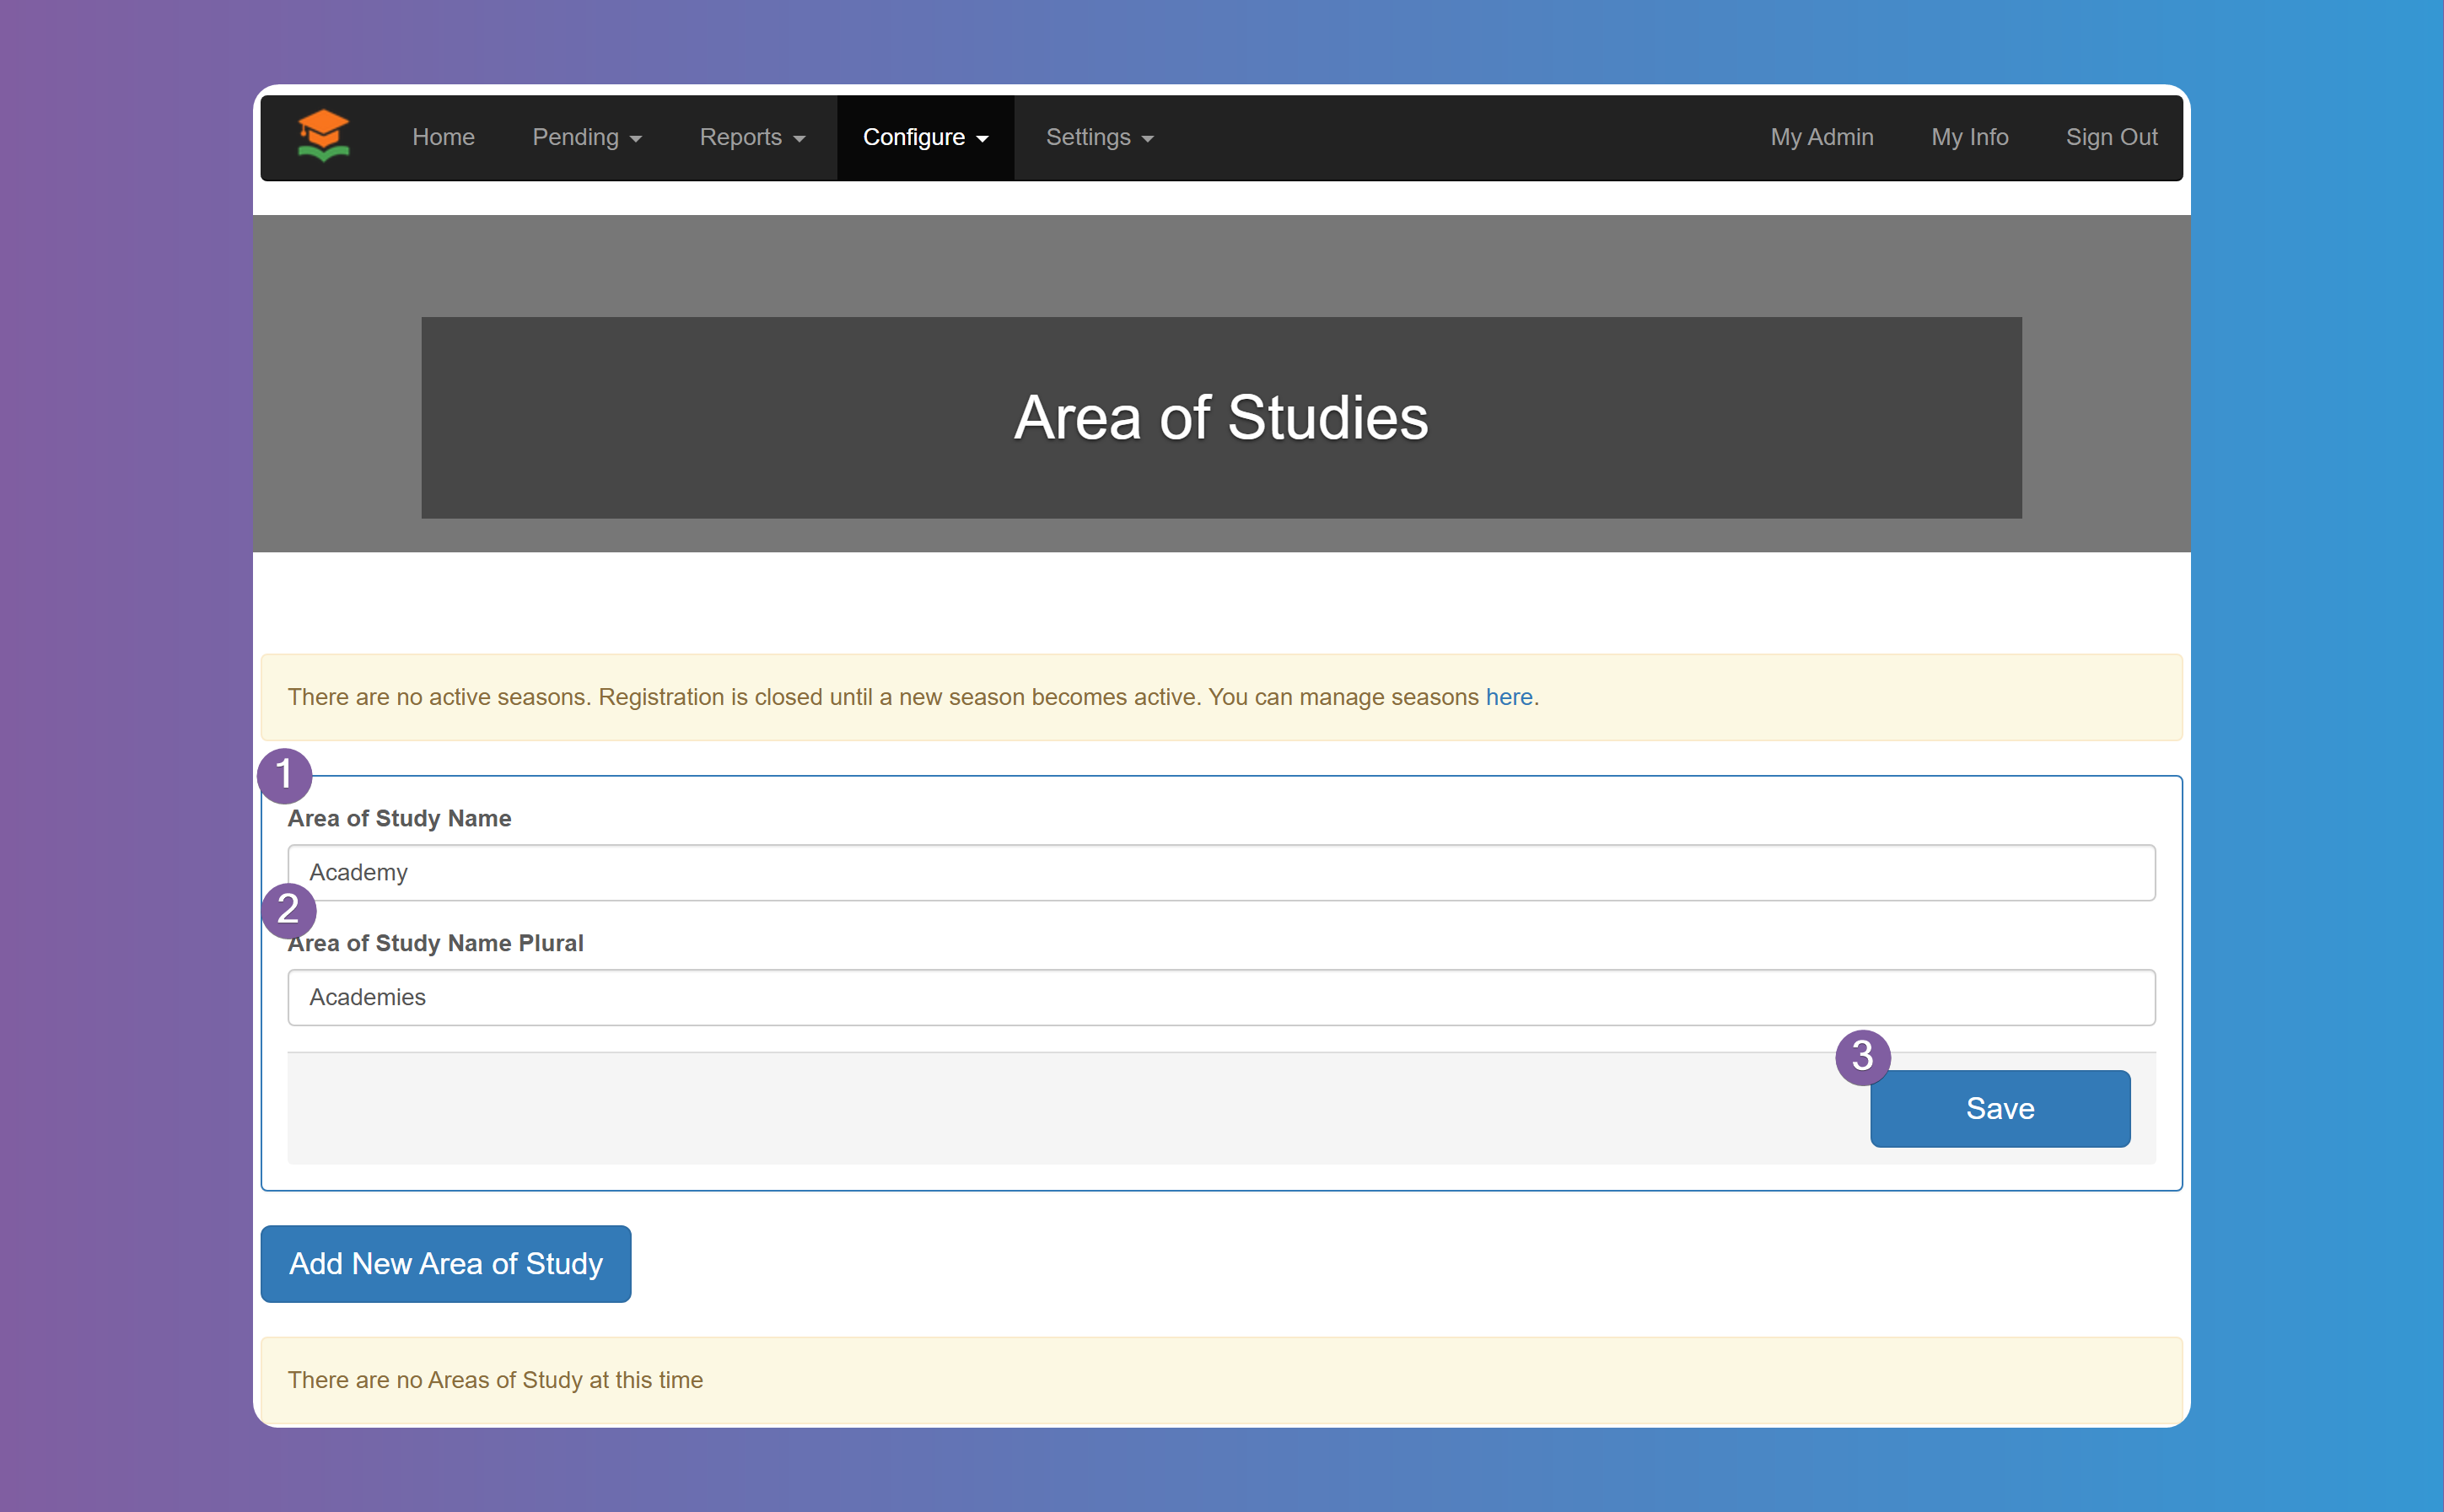
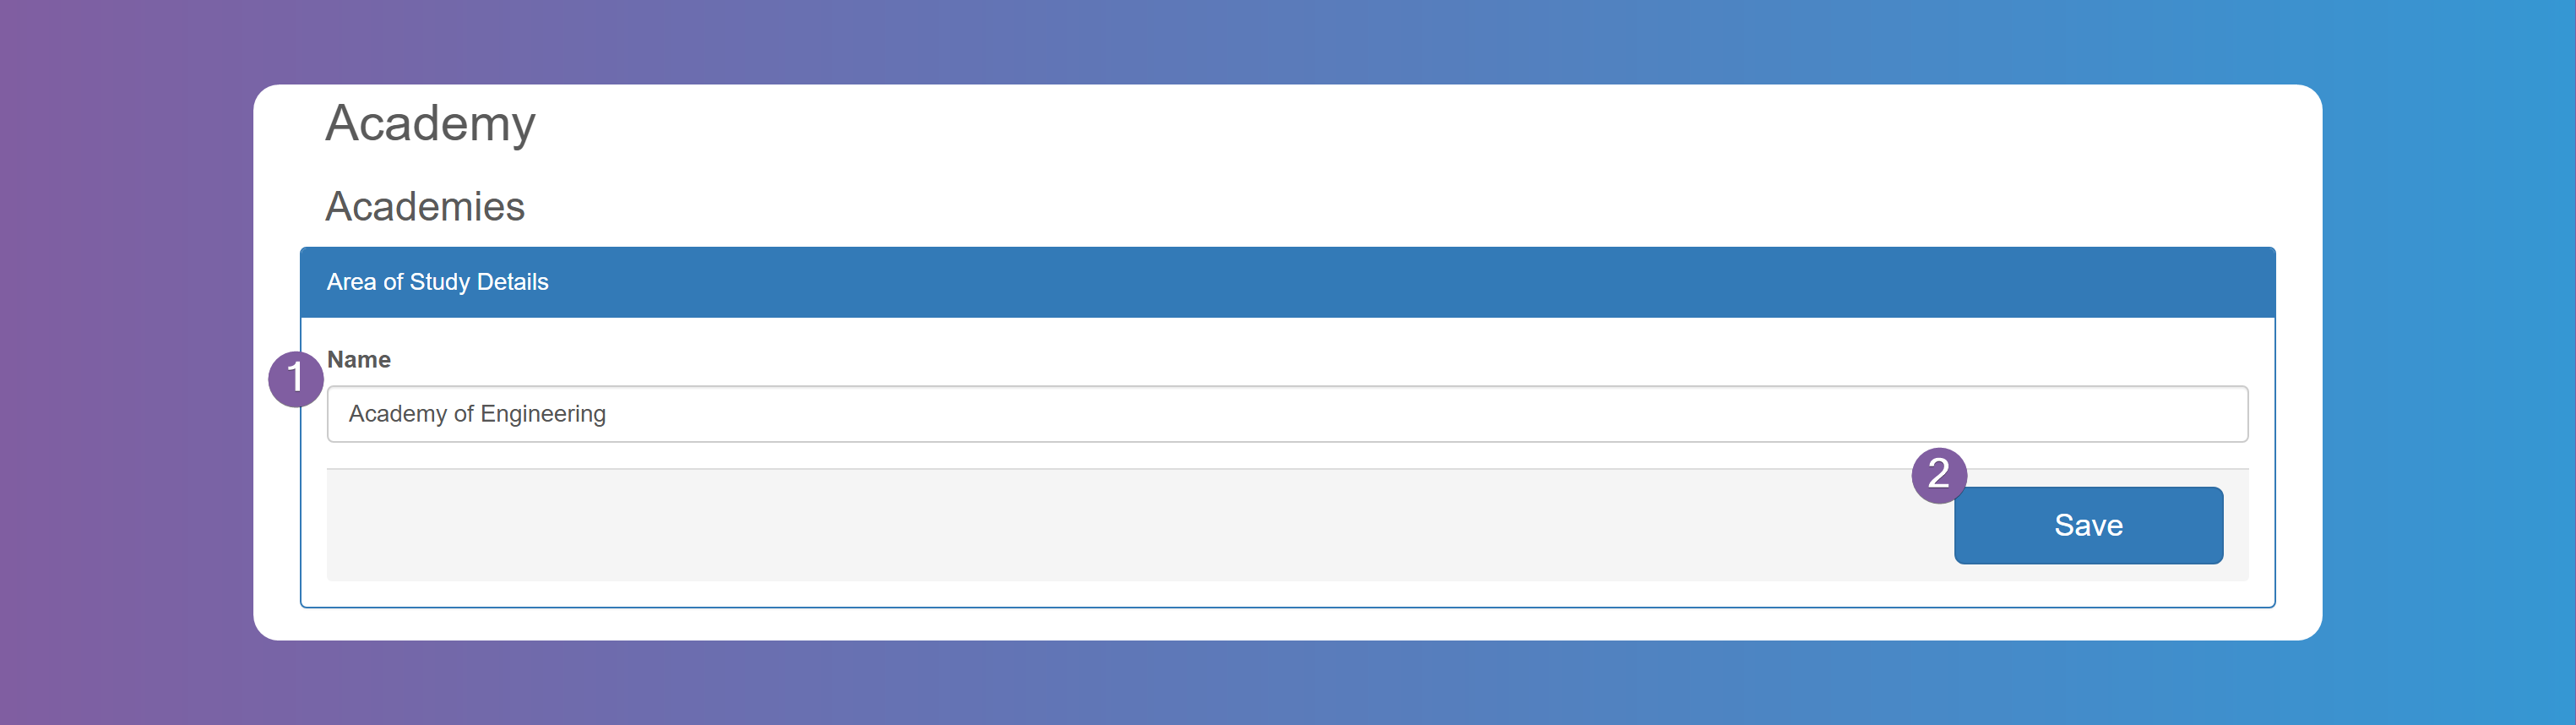
Next you need to add at least one Area of Study as it is a required field for when students sign up. You can have as many as you need. You will relate these Area of Studies to each School. Click on Add New Area of Study button, fill in the name, and click Save. Repeat this steps for as many Areas of Studies you need.
Configurable Student Fields
Choose and set up the Students information according to your needs, by enabling the fields you want the Students to fill in, and choosing which fields are mandatory (required).
If you enable Data Sharing Consent, SMS Opt In or Email Opt In, you can edit the text to your liking and/or choose the default value, when applicable.
Configurable Provider Fields
Choose and set up the Internship Providers information according to your needs, by enabling the fields you want the Internship Providers to fill in, and choosing which fields are mandatory (required).
If you enable SMS Opt In or Email Opt In, you can choose the default value.
Workflow Items
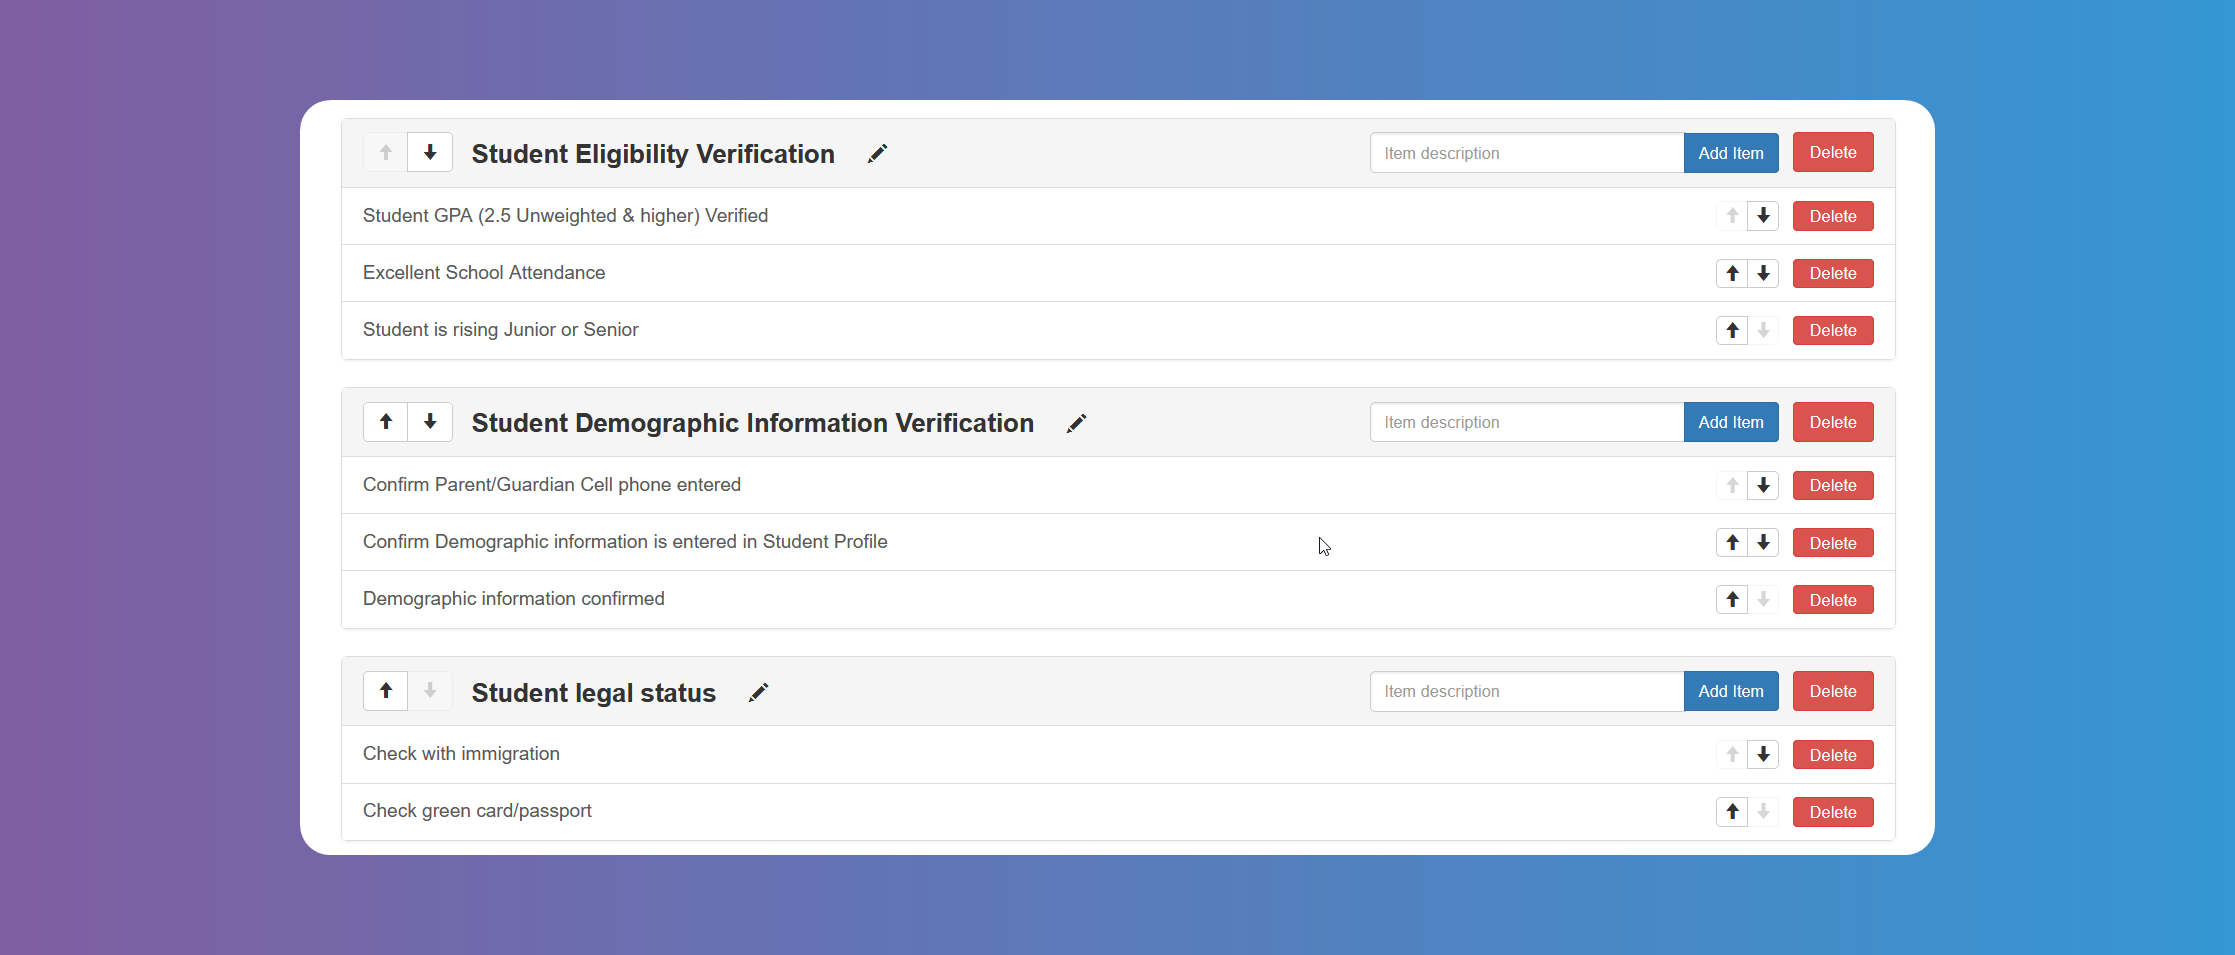
If you have a process you follow to approve Students, you can use Workflow items to help you audit that process. See example below.
- Start by naming the group and clicking on Add Group.

- Add each item within that group by typing it on the box and clicking on Add Item.
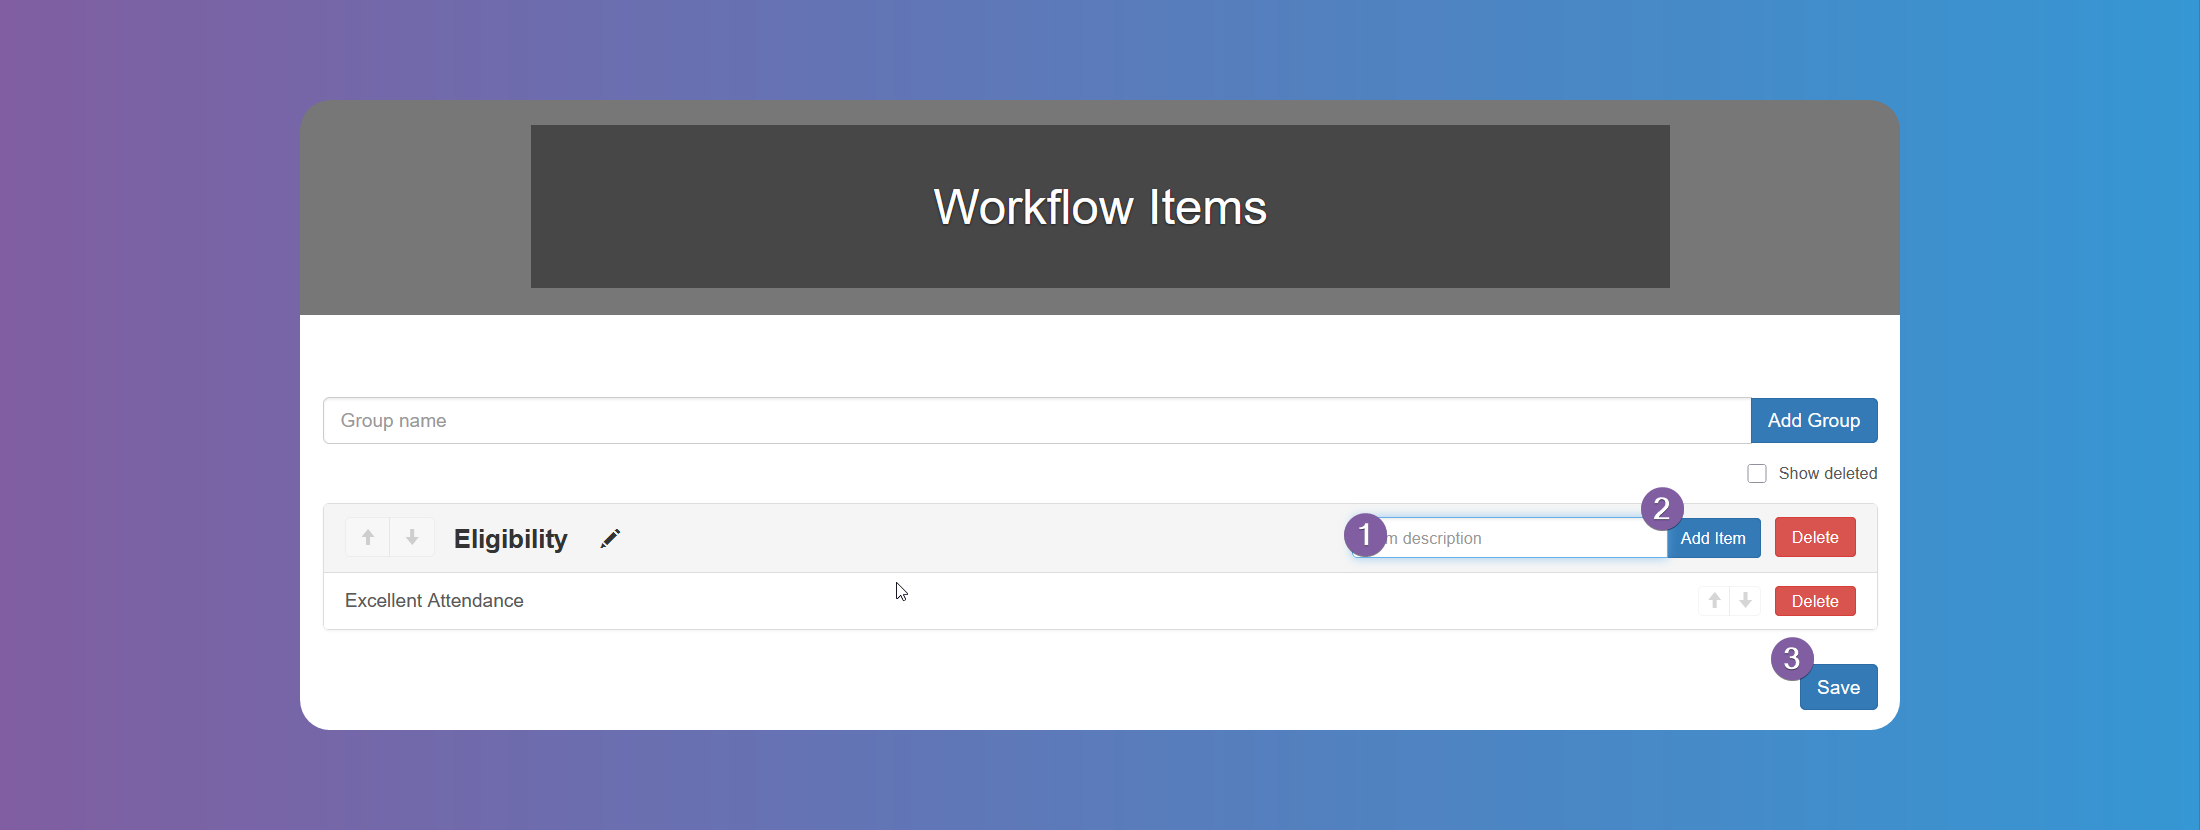
- Click on Save when you have completed all the groups and items.
You can check this criteria before approving Students, from the Student's details Workflow tab (see Approving Users - Students). However, you can still approve the Student without checking this criteria.
The system keeps a log of when and who checked each item
Schools
You need to add all the schools that participate in your internship program, one by one and relate it to each Area of Study you have previously added. Go to Configure > Schools and press Add New School.
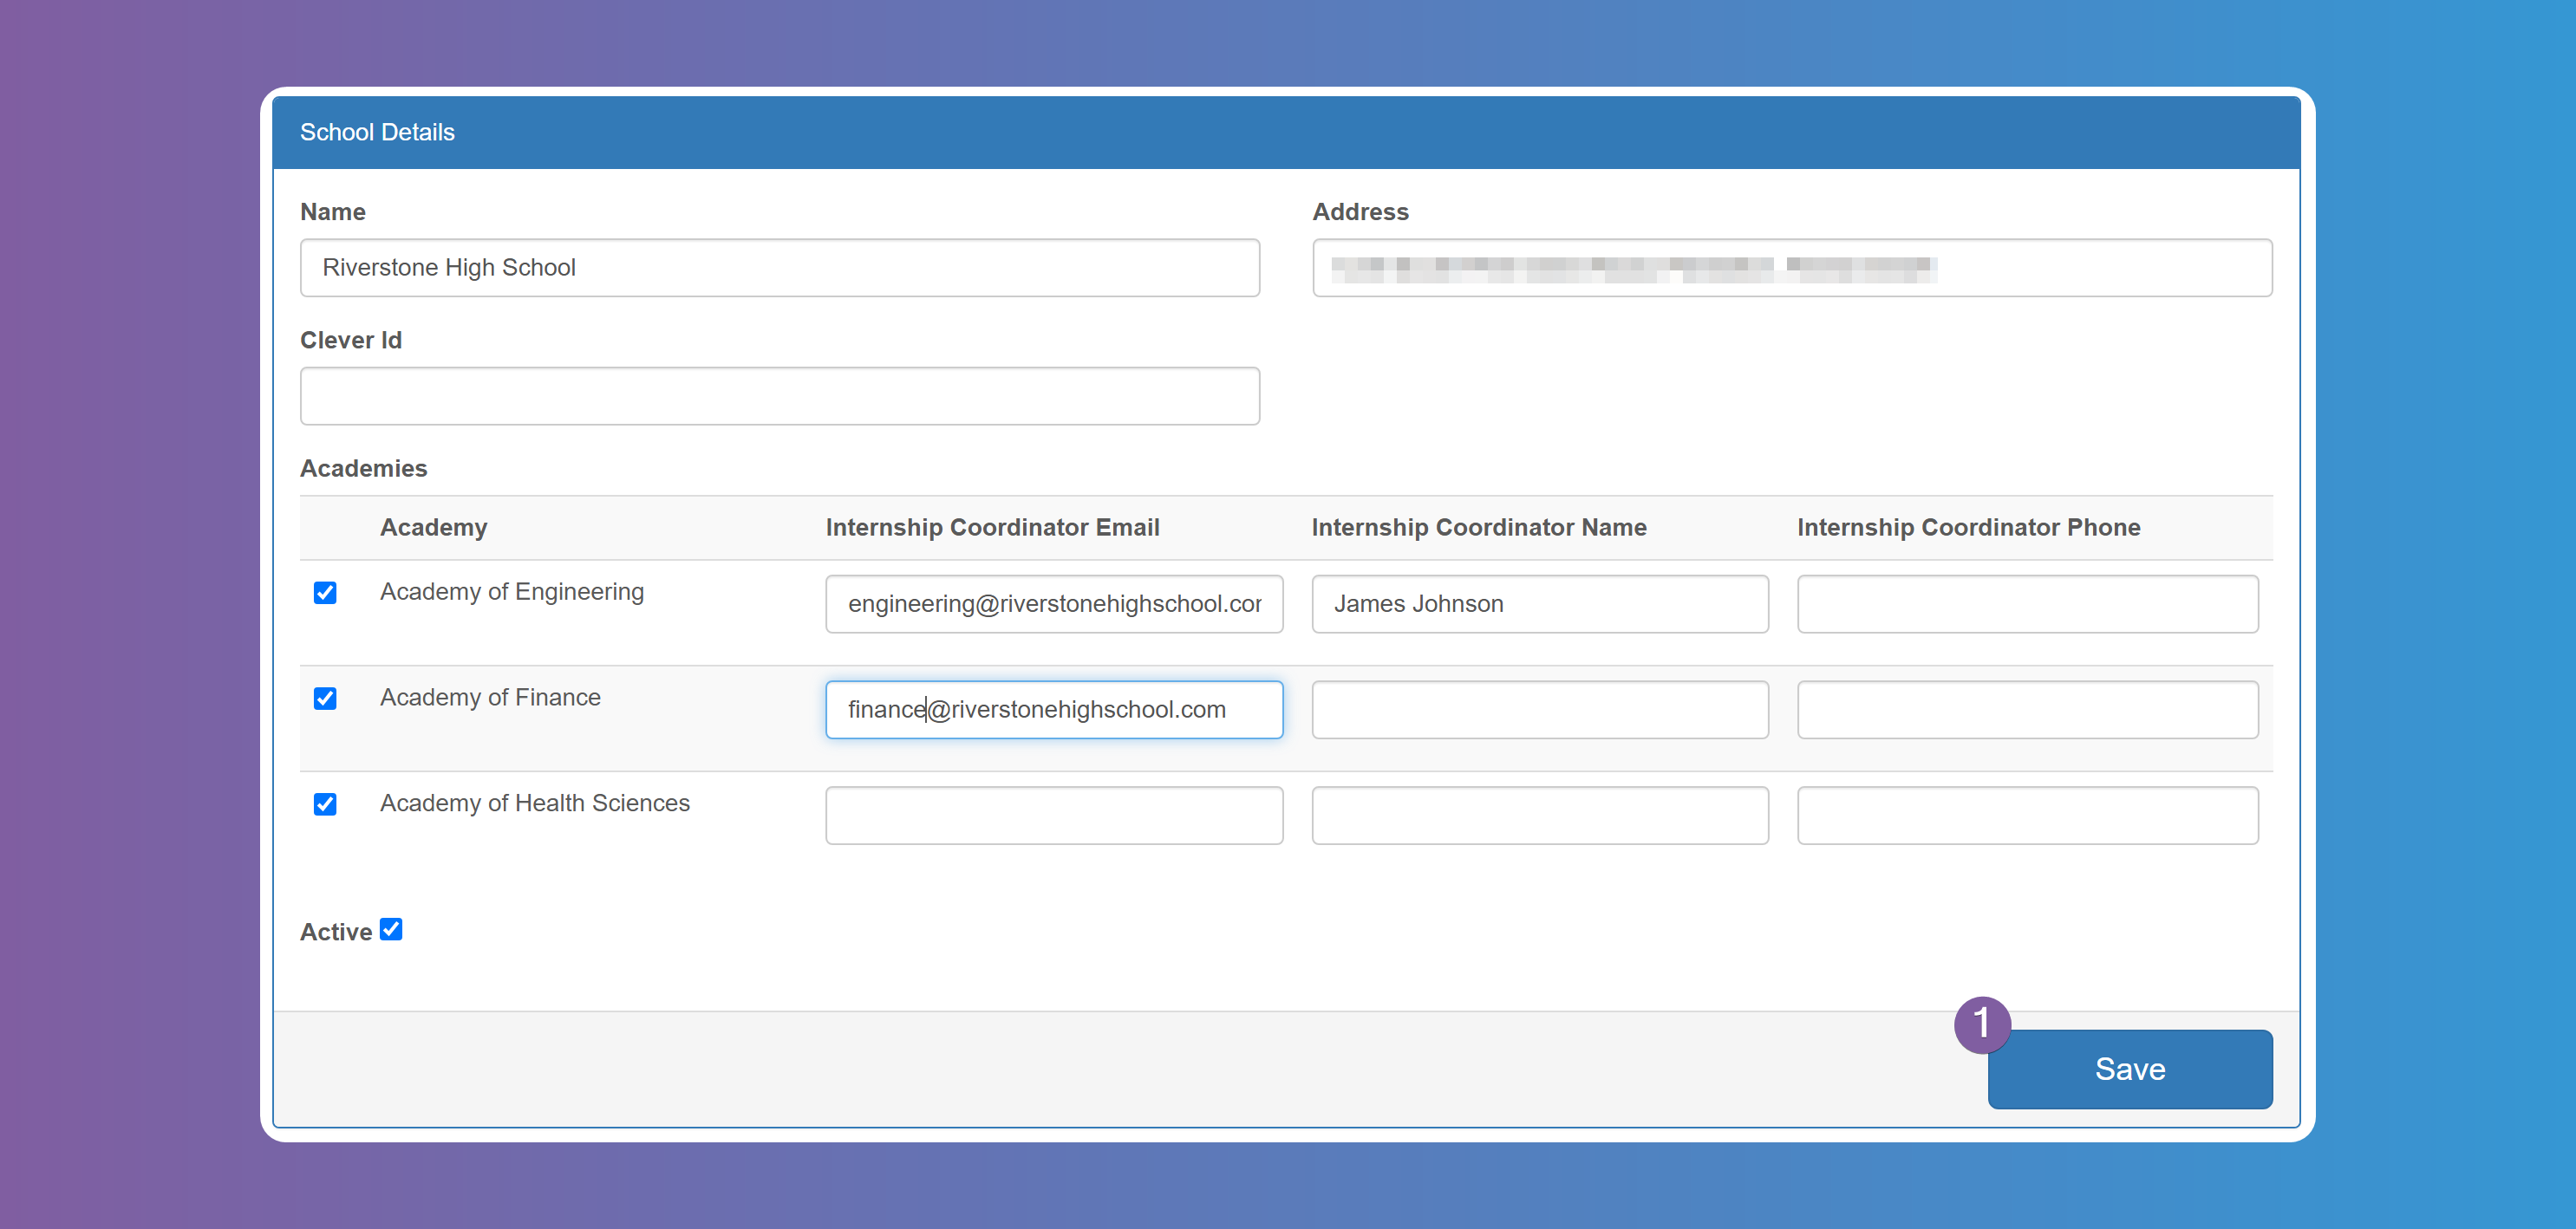
Enter the Name and Address, select the Area of Studies that this school is related to and specify the coordinator's email, name, and phone number for that Area of Study in that School. The email is used to let the coordinator know of every interview each student is scheduled for. Note that these values are optional and you can leave blank. When all done, click on Save. Repeat the steps for each school in your district.
Each School requires at least one Area of Study related to it. If some schools don't have an Area of Study you can create a generic Other, Unknown, etc Area of Study and relate it to that School.
Events
You can use this tool for any event in which Internship Providers can participate to interview Students. When scheduling interviews the active Events will appear as an option to schedule the interviews.
Seasons
Seasons are a way to group everything that happens within a designated period for internships. Students, Internship Providers, Internships, and everything related to them happens within the Season. Students and Internship Providers need to apply to each new Season in order to be able to participate within that period.
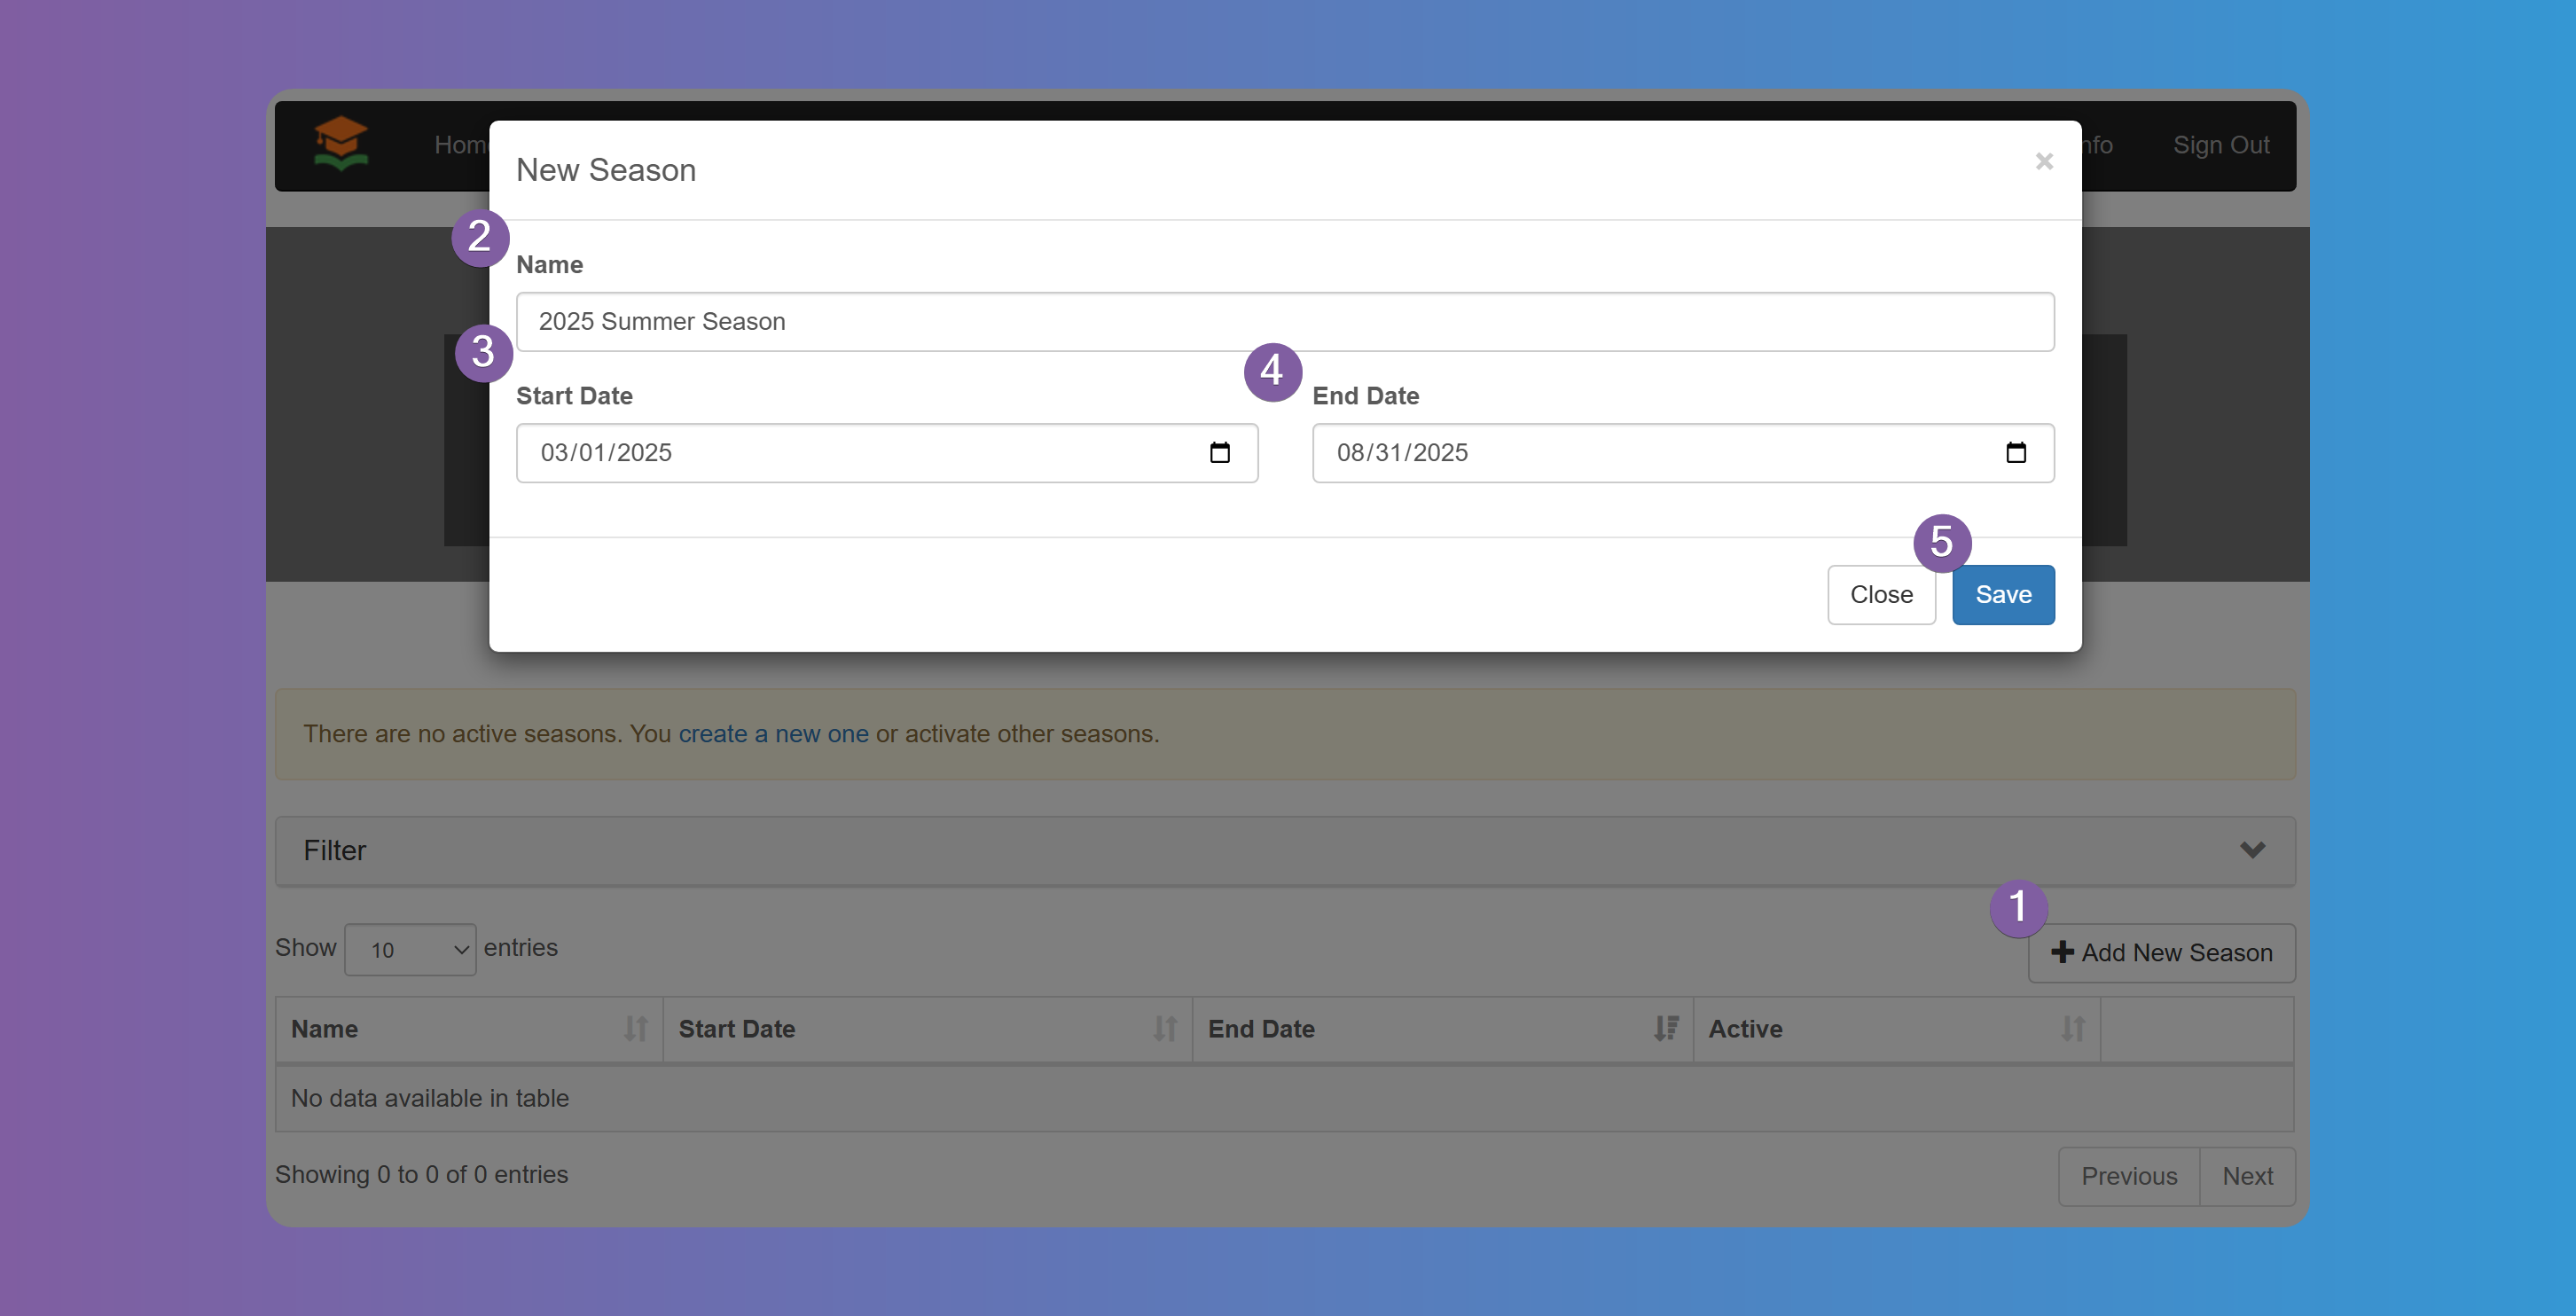
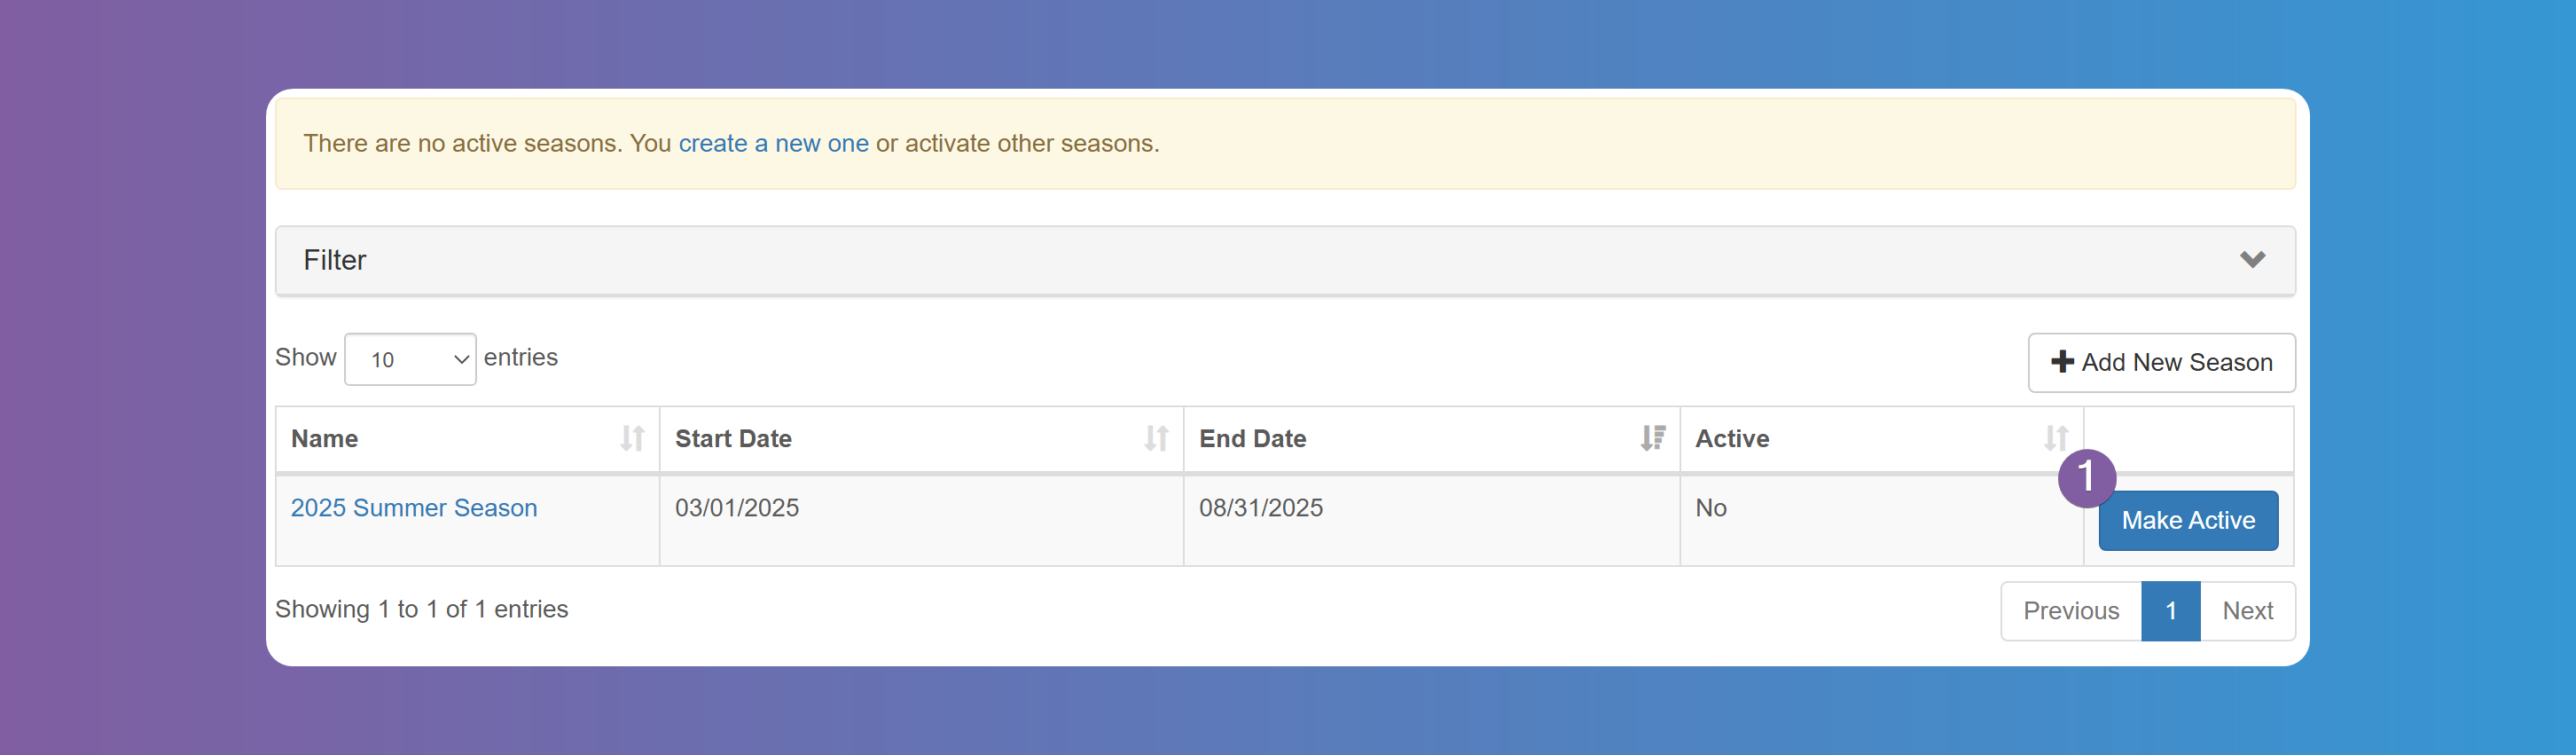
The system requires to have at least one active Season in order for Students and Internship Providers to be able to register. If there isn't an active Season then registration is automatically disabled.
To add a new Season go to Configure > Seasons and click on the Add New Season button. Specify a Name, Start and End Date.
The dates are not the dates the Internships takes place, but rather the dates you want the users to start registering, want to find Internships and Students all the way through the actual Internship when Students submit Timesheets and Providers provide their Evaluations.
After you have added the Season, you need to make it active by pressing the Make Active button.
You can only make a Season active as long as the dates fall within today's date.
You can have multiple Seasons active at the same time. Some Schools/Districts want to have Seasons overlap so Students can start registering for the next Season while the current Season is ongoing.
Grades
Set up the Grades from which students can participate in the program as well as the cut-off date, which is used to calculate the student's graduation date.
Industries
Set up the Industries for Job offers, according to your needs, from the given list.
Please let us know if you need other Industries to be added to the list. Refer to How to contact support.
Content Pages
You can fill in the content you want to appear on Home, About and Contact. Each page is divided into two types of content: the Header and the Main Content. You can easily edit the content with the simple WYSIWYG, but if you feel adventurous you can emerge yourself in the world of HTML.


Forms
You can upload any forms you need the Students or Internship Providers to read. You can use this section to upload forms that require the user to fill in. Tap on Add New Form and fill in the fields. Tap on Save to upload the form from your device.
The system does not automatically submit these forms, the user will need to download, fill them in, and submit them through other means, such as email.
Admin Users
Add Admin Users according to your needs. They will receive an email letting them know their account has been created.
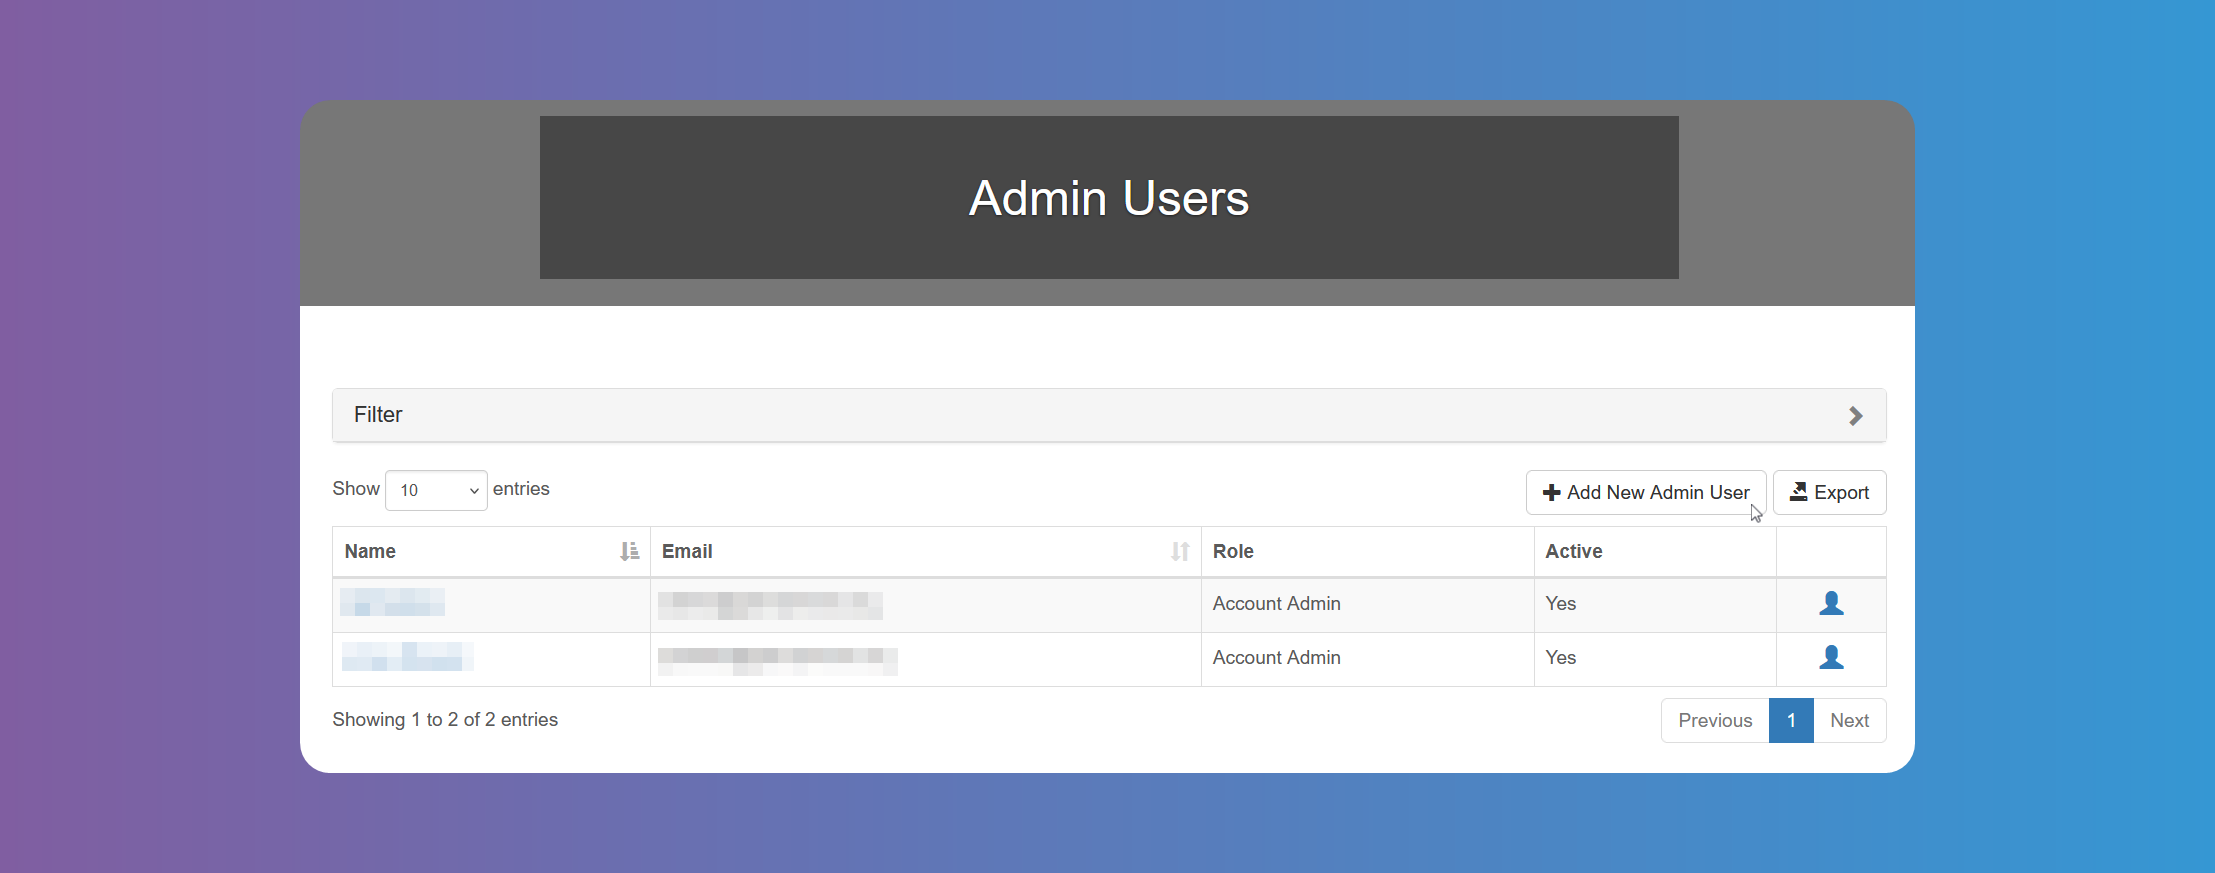
Admin Users can be one of 3 types, and this role must be chosen when adding a new Admin User:
Account Admin: user has access to all features and configurations, allStudentsandInternship Providers.Supervisor Admin: user has access to allStudentsandInternship Providers, but cannot make changes to configurations or settings.Supervisor: user has access only to theSchools,Areas of StudyorStudentsselected. This restriction can be selected herein.
You can also choose to send an email to the new Admin User.
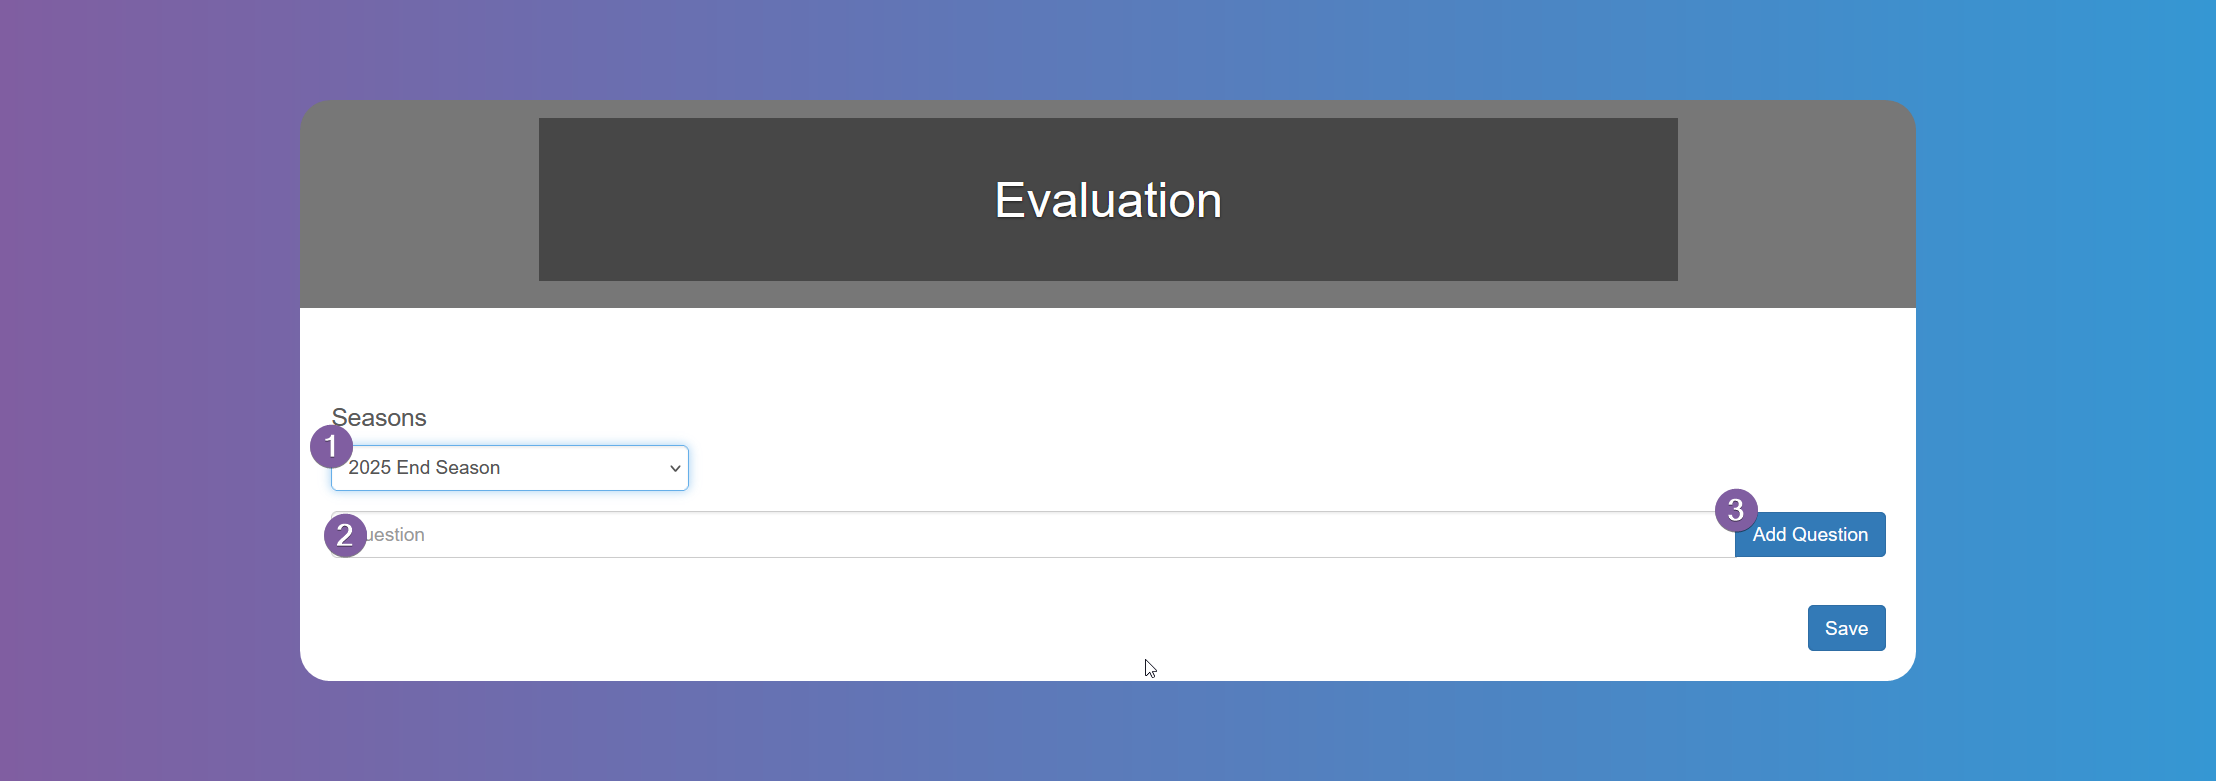
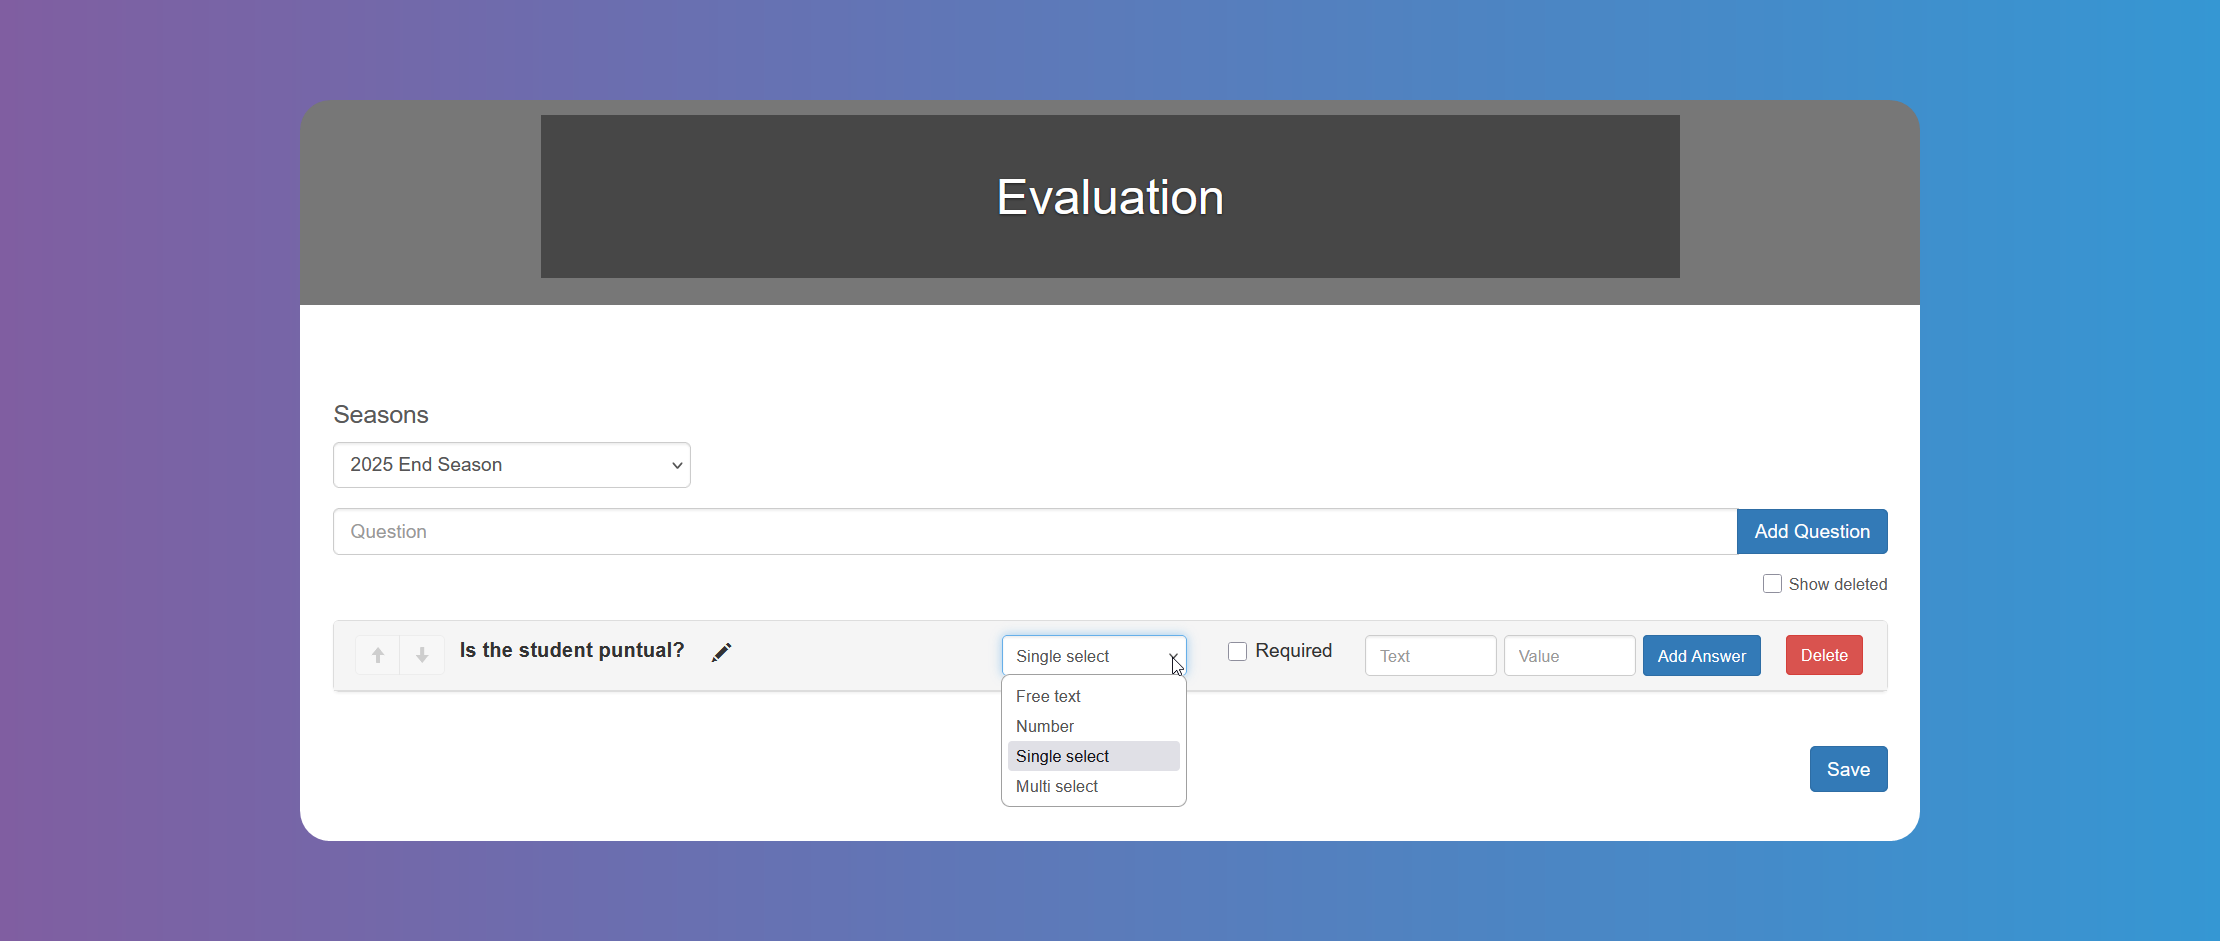
Evaluations
You can use Evaluations to have the providers grade the student's performance during their internship. Set up the questions needed to evaluate the Students. Choose the answer to be free text, number, single select or multi select. Choose the text and values according to your needs.
You need to set up these questions for each Season.