Getting Started
Welcome to GetMyInterns: A Guide for School & District Administrators
Welcome to GetMyInterns! As a school or district administrator, you're responsible for overseeing and managing your internship program. This includes configuring your settings, running reports, and managing user access. This guide will help you take your first steps.
How to Set Up Your School or District Account
1. Log In to Your Admin Dashboard
Once your account is created, you’ll receive a welcome email with your login credentials. Click on the link in the email and login using your email and unique password that was generated for you. You can change the password by clicking on My Info > Reset Password

2. Configure Area of Study
The Area of Study, a category or field in which students focus their academic and internship pursuits, should be the first thing you configure. At least one Area of Study is required. Since different schools/districts have different names for it, you can configure the name first. Some schools/districts call them Academies, Pathways, Tracks, Concentrations, etc. You will need to configure the singular and plural name for it first by going to Configure > Area of Studies
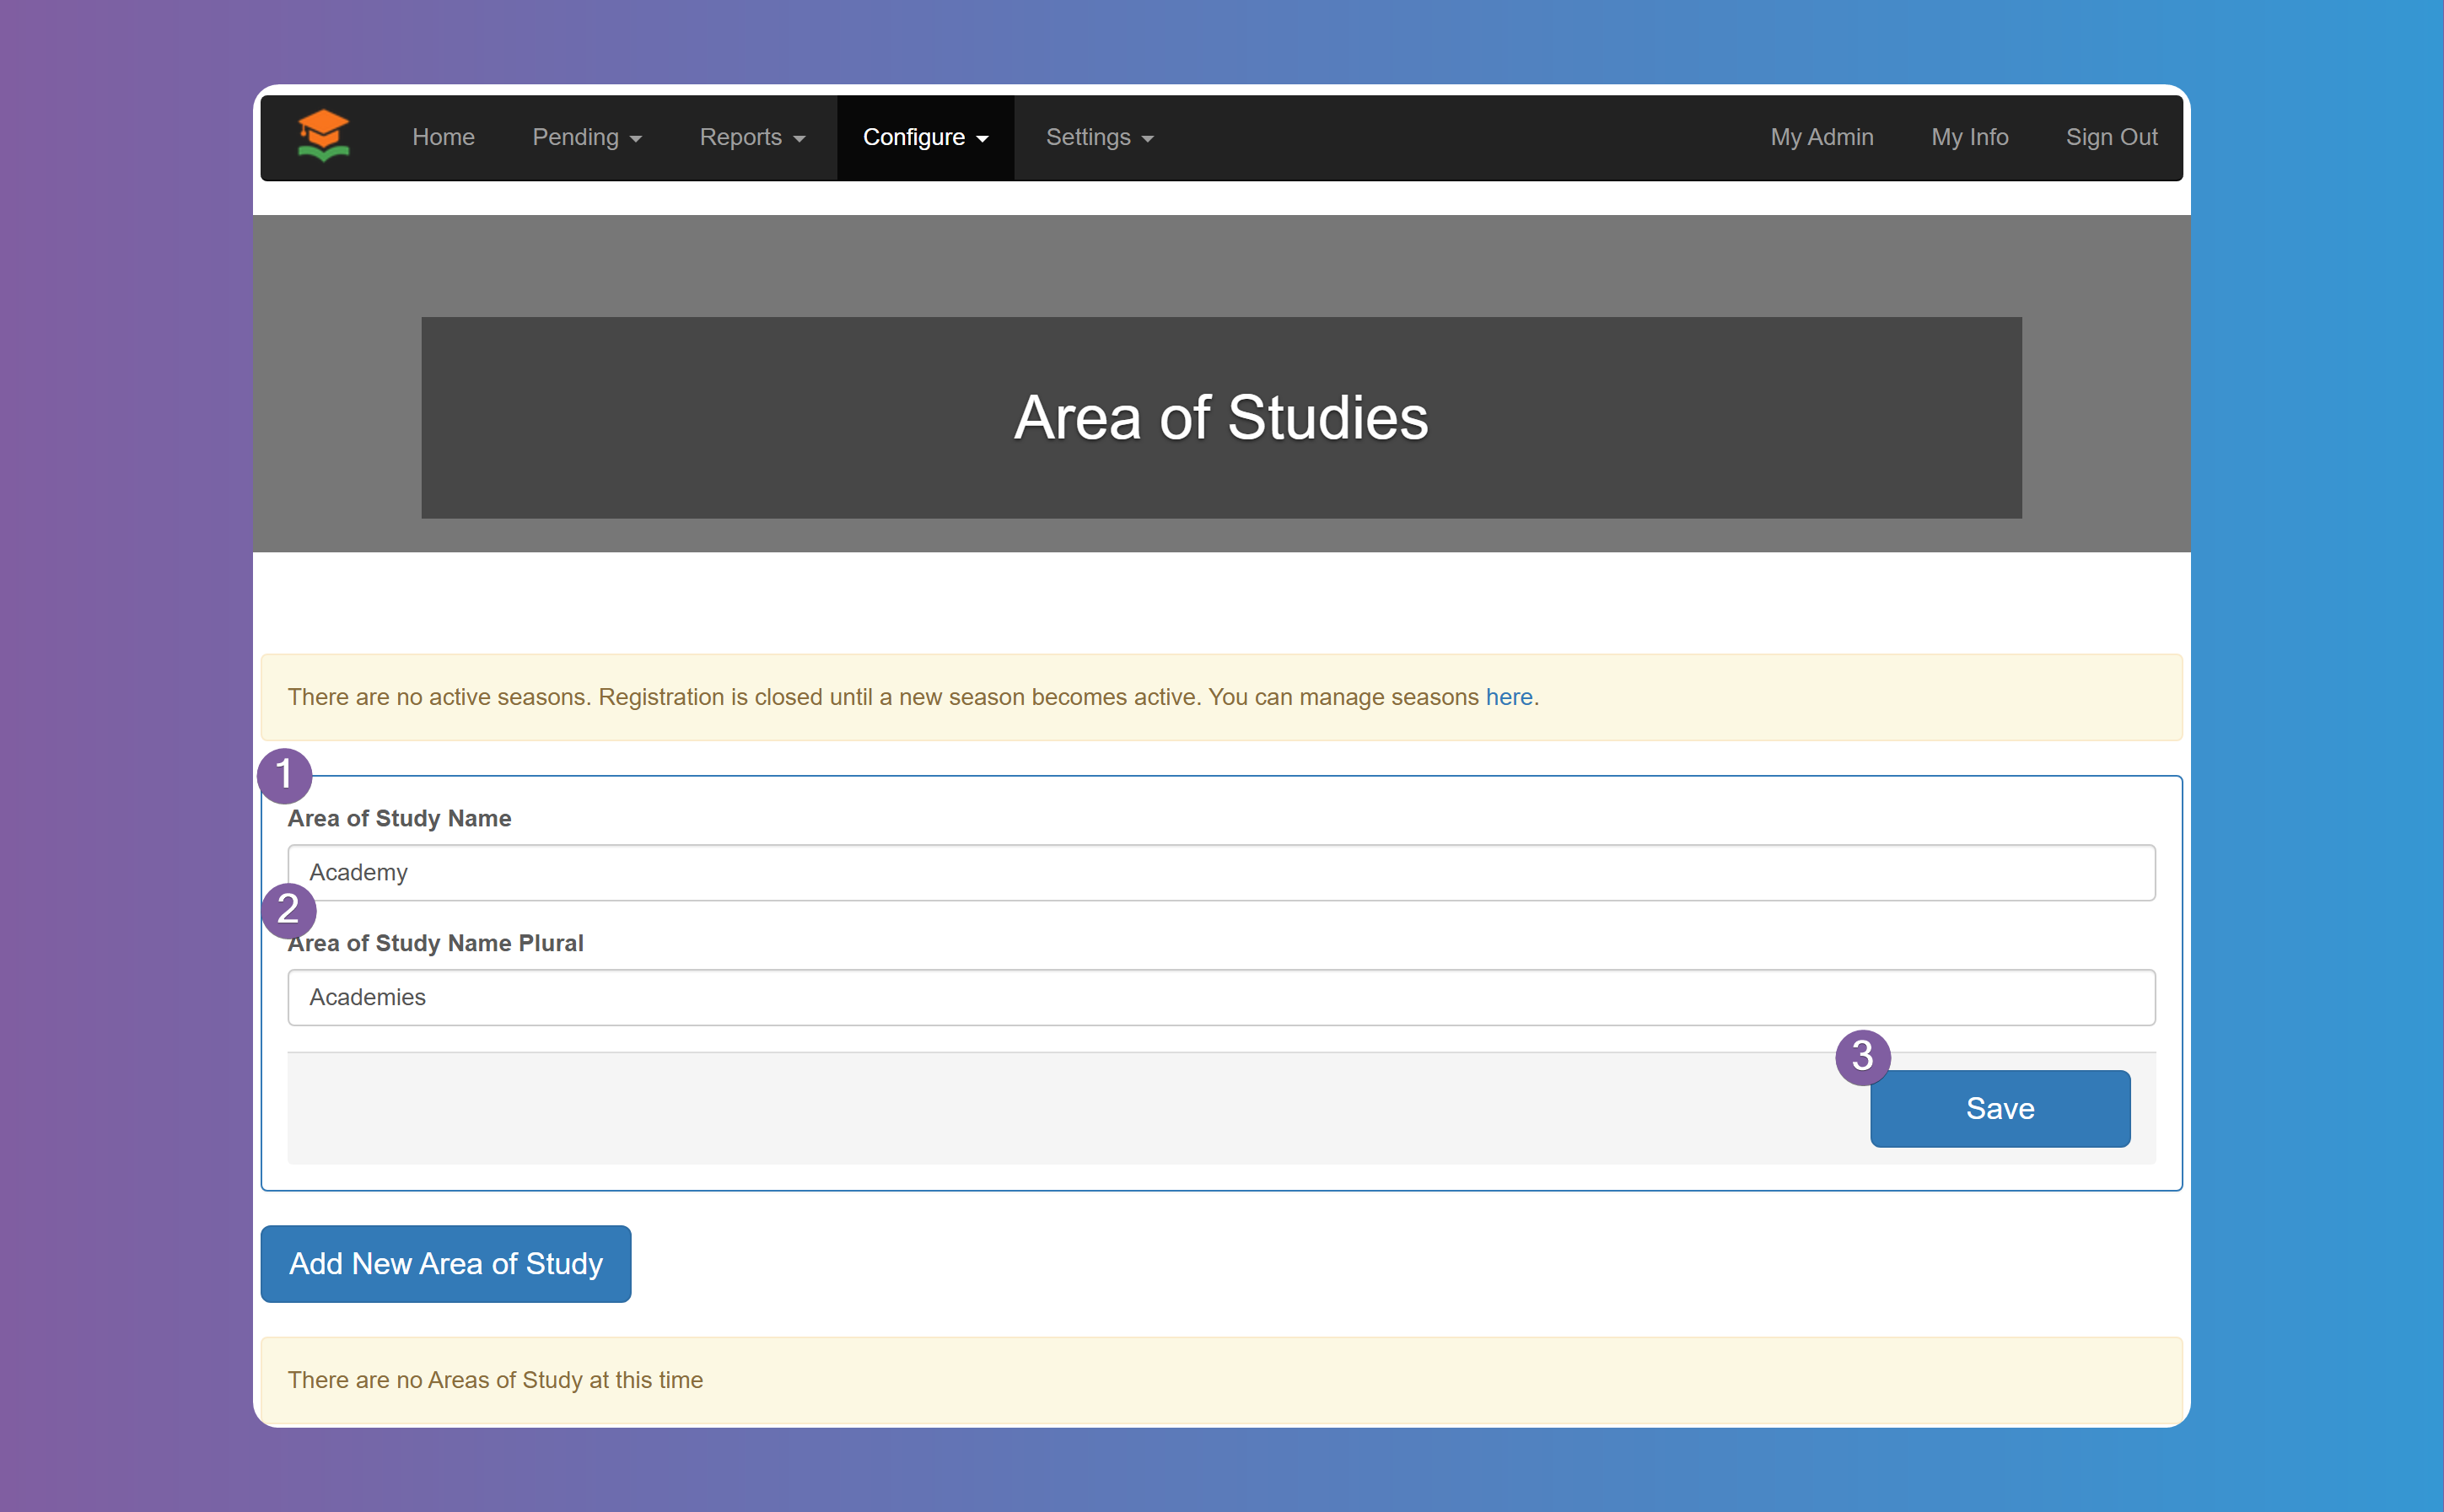
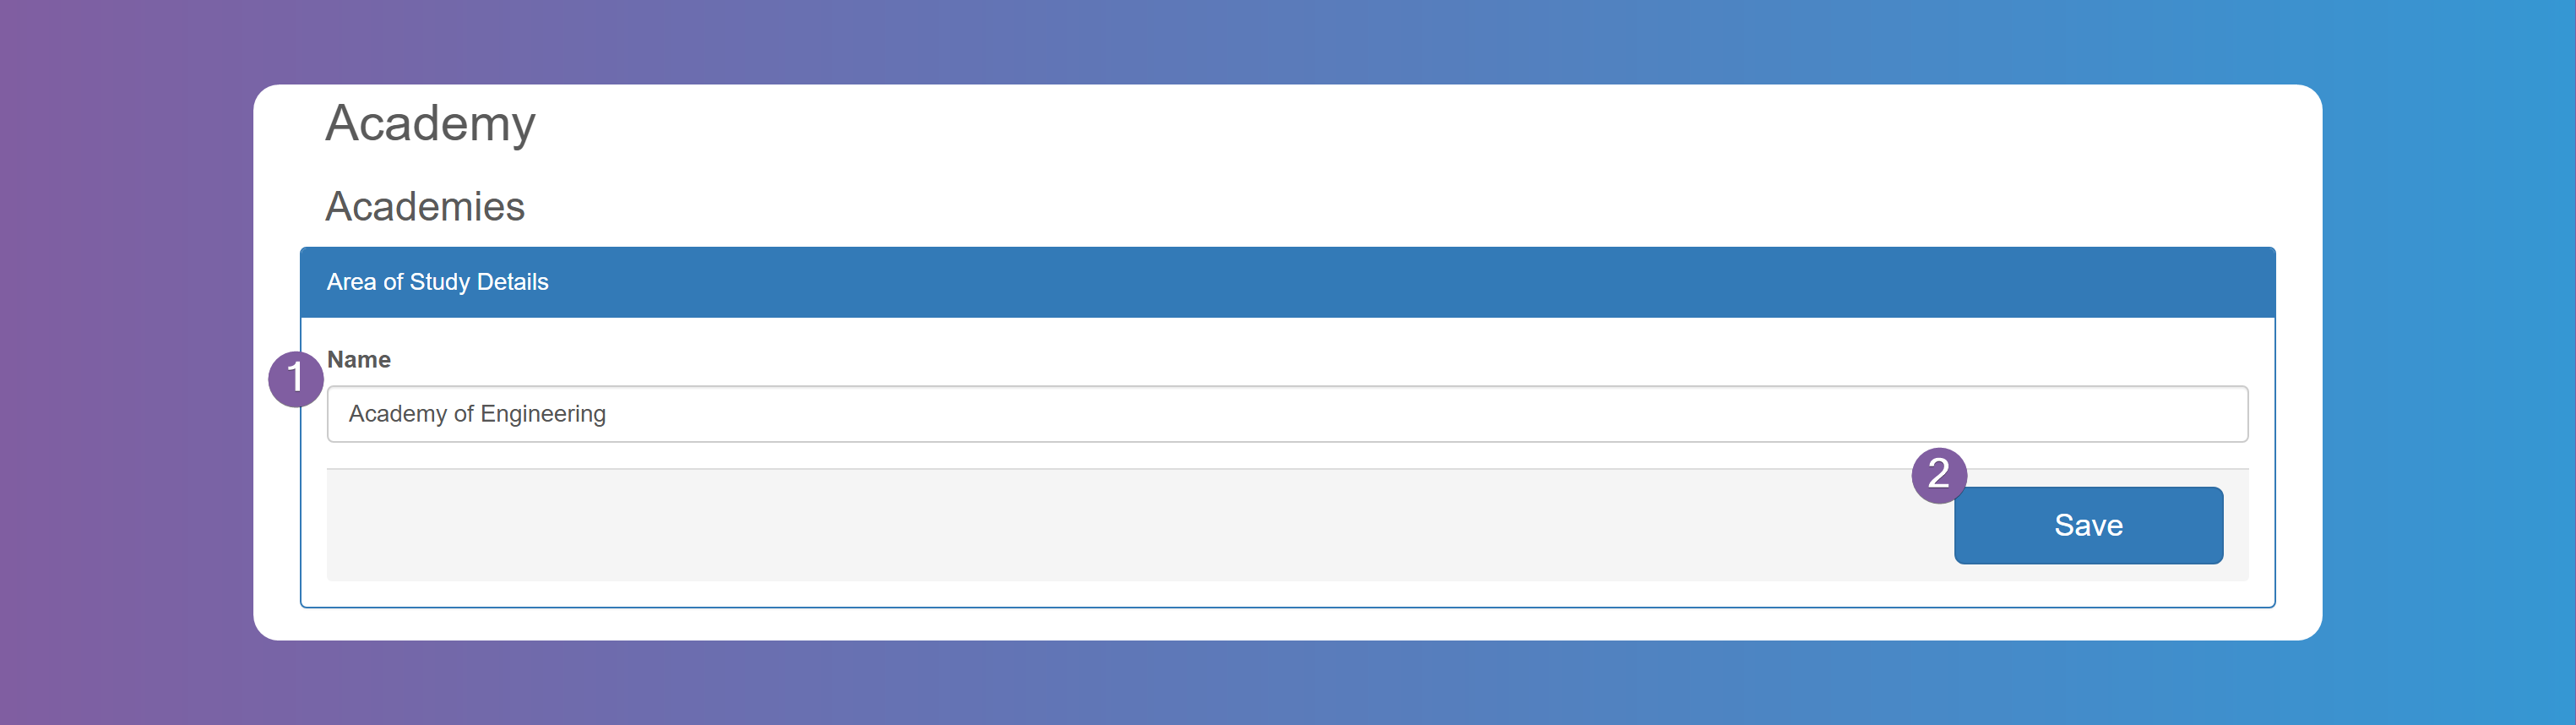
Next you need to add at least one Area of Study as it is a required field for when students sign up. You can have as many as you need. In the next step you will relate these Area of Studies to each School. Click on Add New Area of Study button, fill in the name, and click Save. Repeat this steps for as many Areas of Studies you need.
3. Configure Schools
Next up are all the schools that participate in your internship program. You need to add it one by one and relate it to each Area of Study you added in the previous step. Go to Configure > Schools and press Add New School.
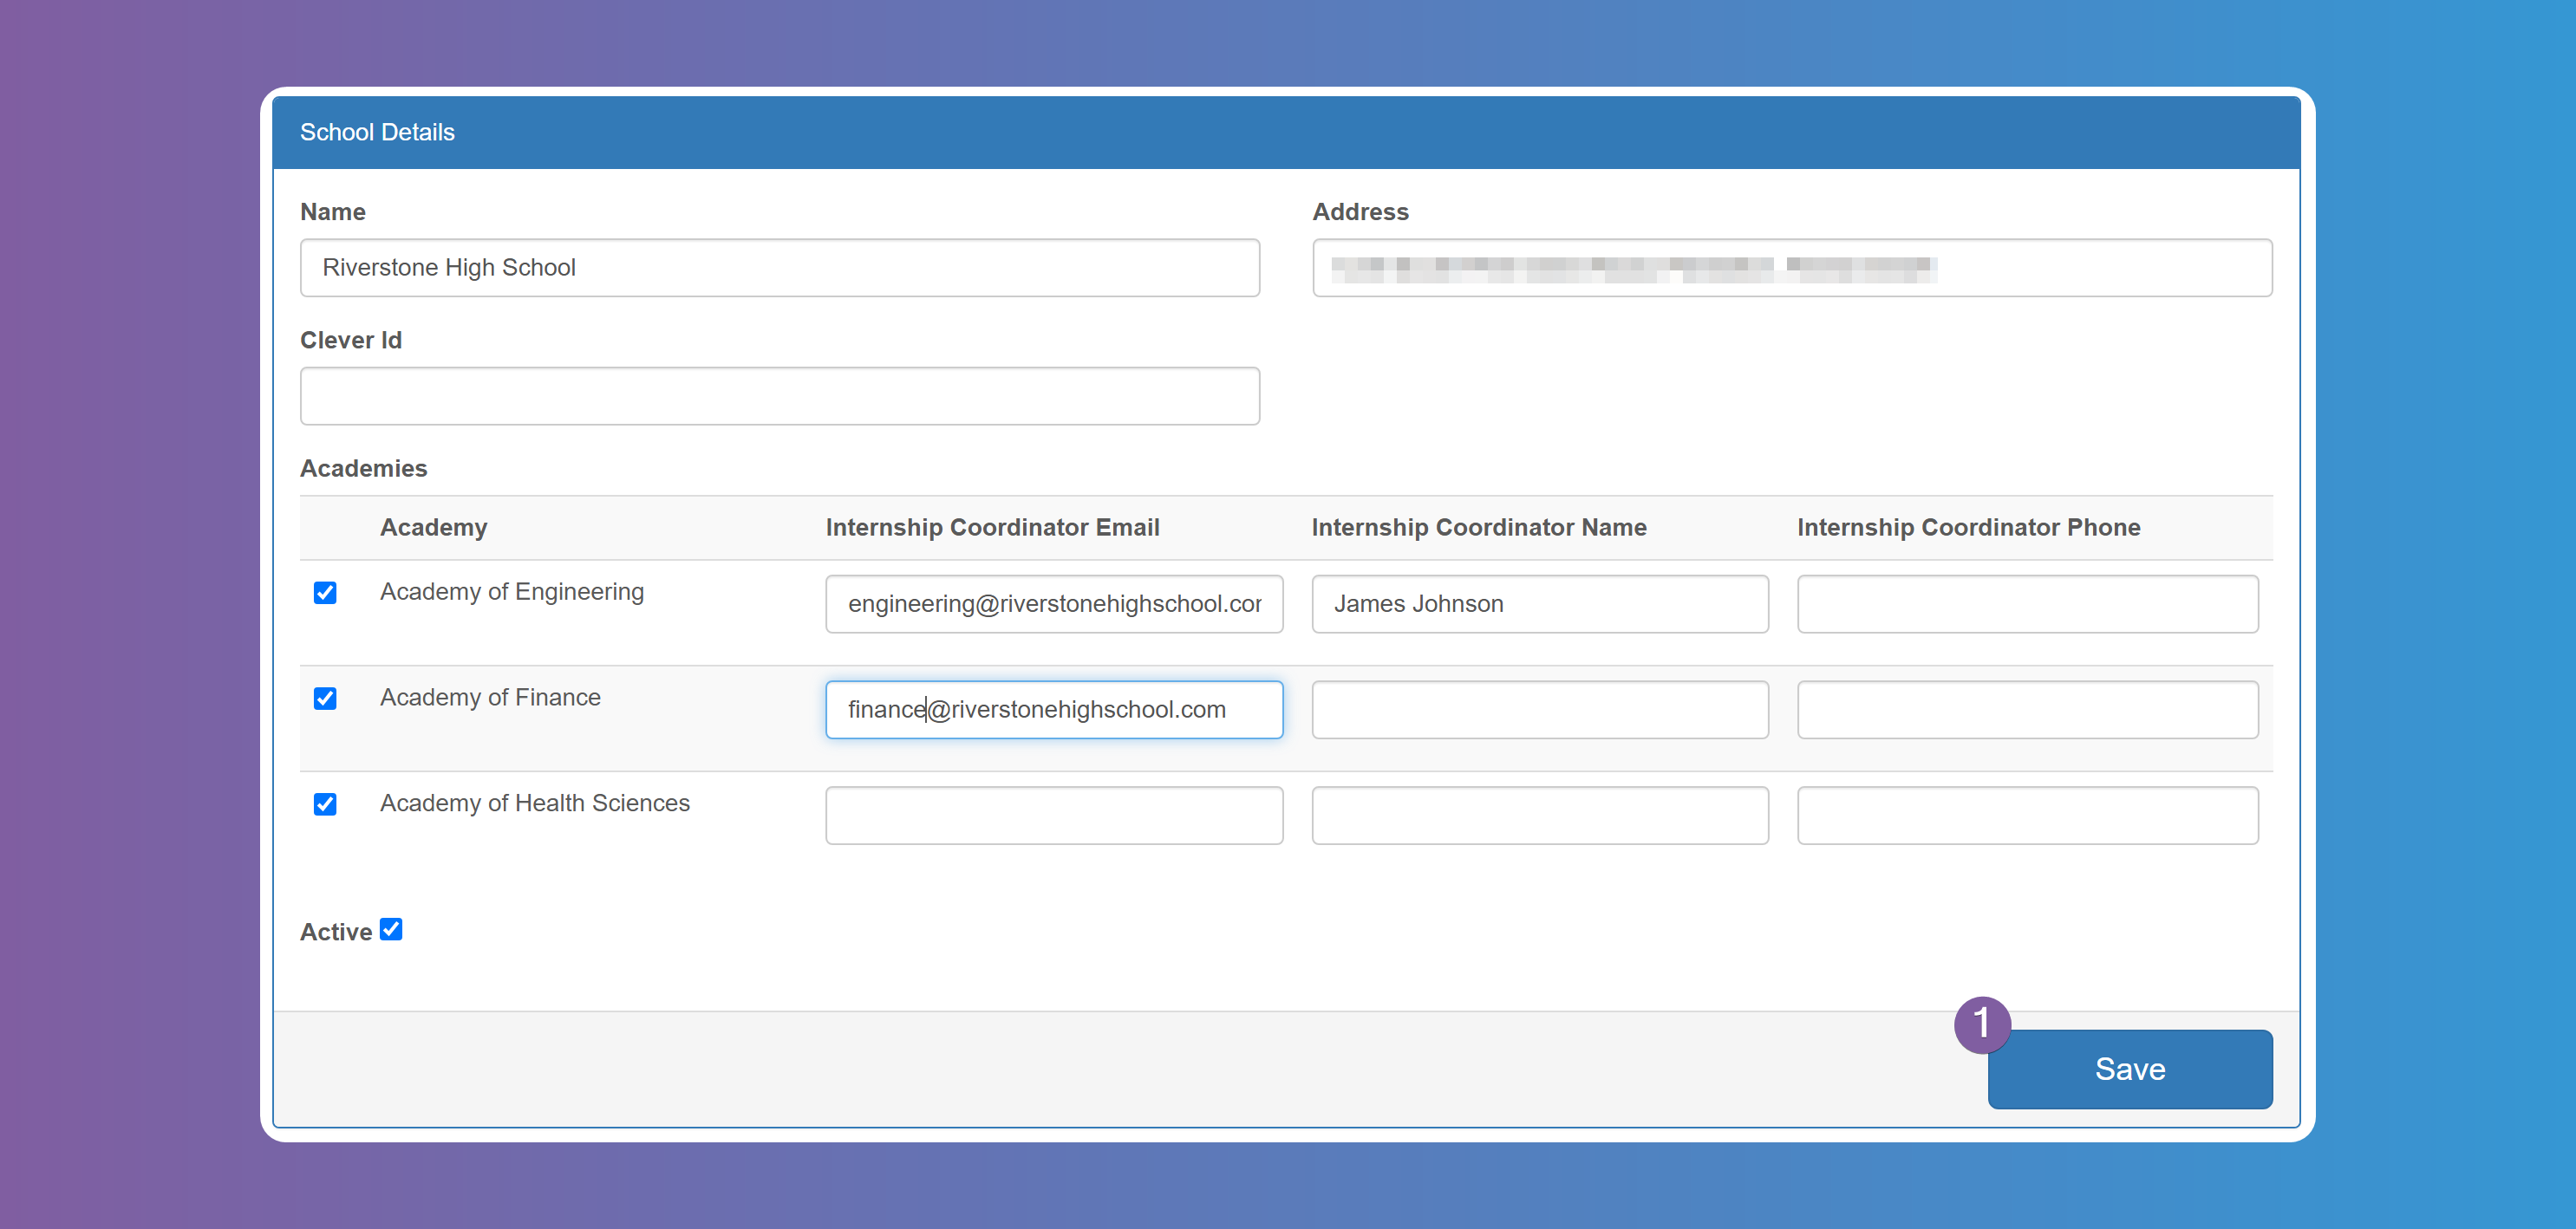
Enter the Name and Address, select the Area of Studies that this school is related to and specify the coordinator's email, name, and phone number for that Area of Study in that School. The email is used to let the coordinator know of every interview each student is scheduled for. Note that these values are optional and you can leave blank. When all done, click on Save. Repeat the steps for each school in your district.
Each School requires at least one Area of Study related to it. If some schools don't have an Area of Study you can create a generic Other, Unknown, etc Area of Study and relate it to that School.
4. Configure Seasons
Seasons are a designated period for internships. Students, Internship Providers, Internships, and everything related to them happens within the Season. Students and Internship Providers need to apply to each new Season in order to be able to participate within that period.
The system requires to have at least one active Season in order for Students and Internship Providers to be able to register. If there isn't an active Season then registration is automatically disabled.
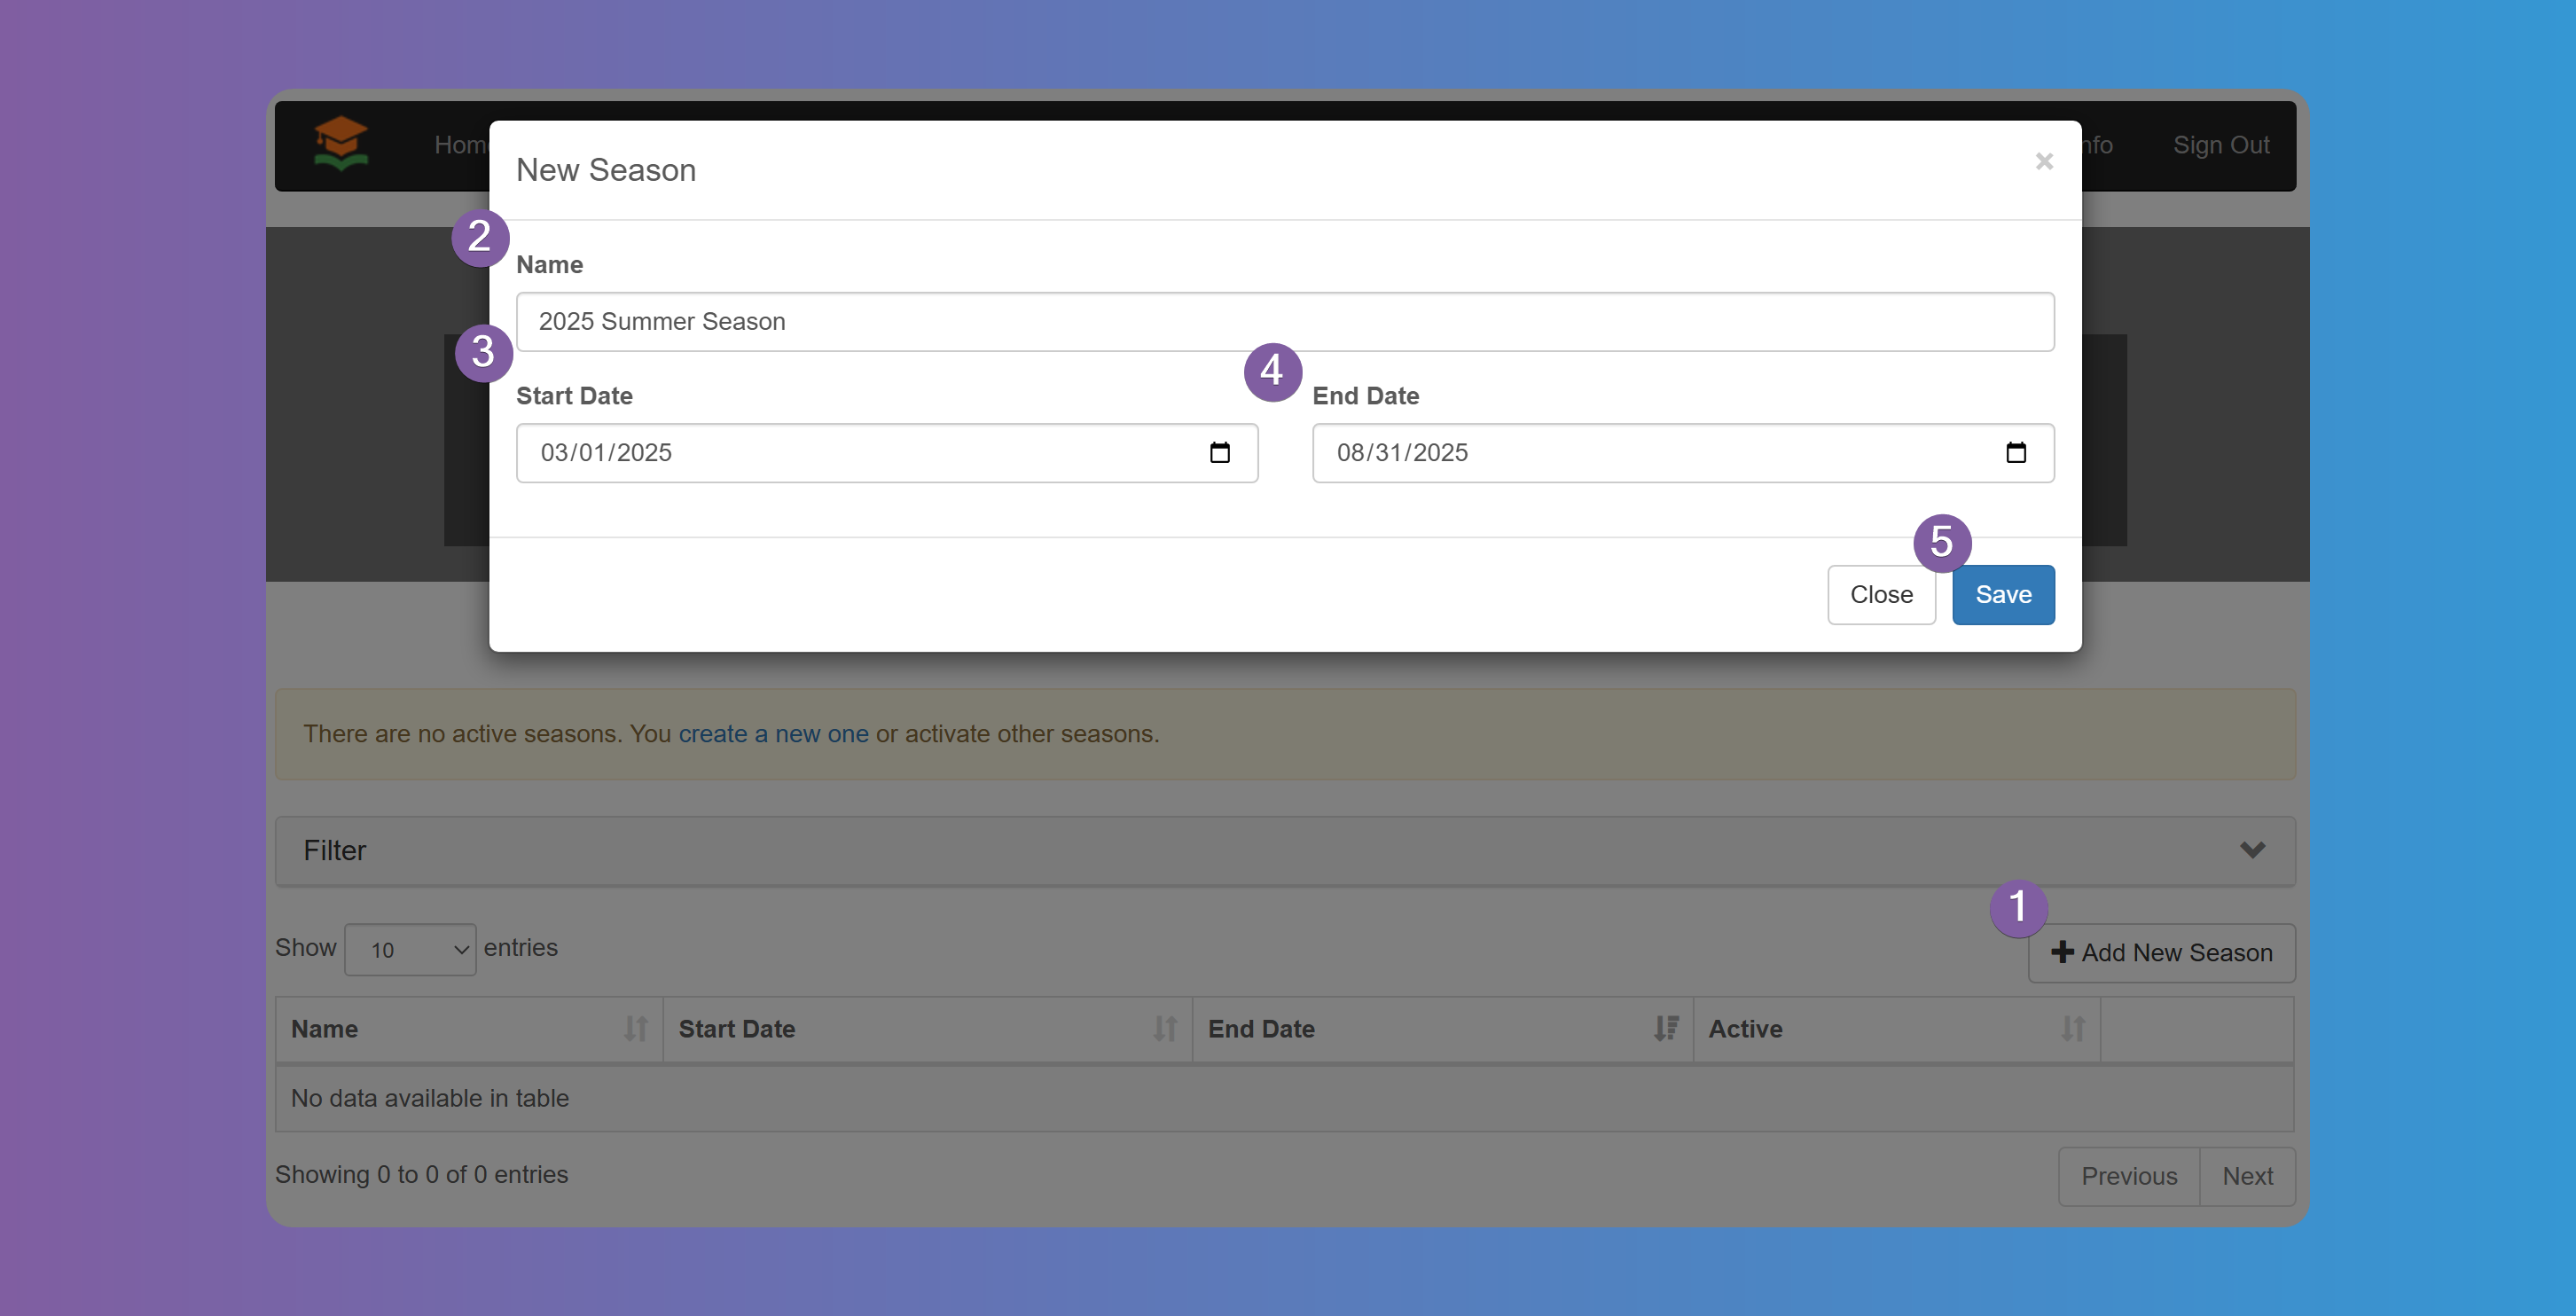
To add a new Season go to Configure > Seasons and click on the Add New Season button. Specify a Name, Start and End Date.
The dates are not the dates the Internships take place, but rather the dates you want the users to start registering, want to find Internships and Students all the way through the actual Internship when Students submit Timesheets and Providers provide their Evaluations.
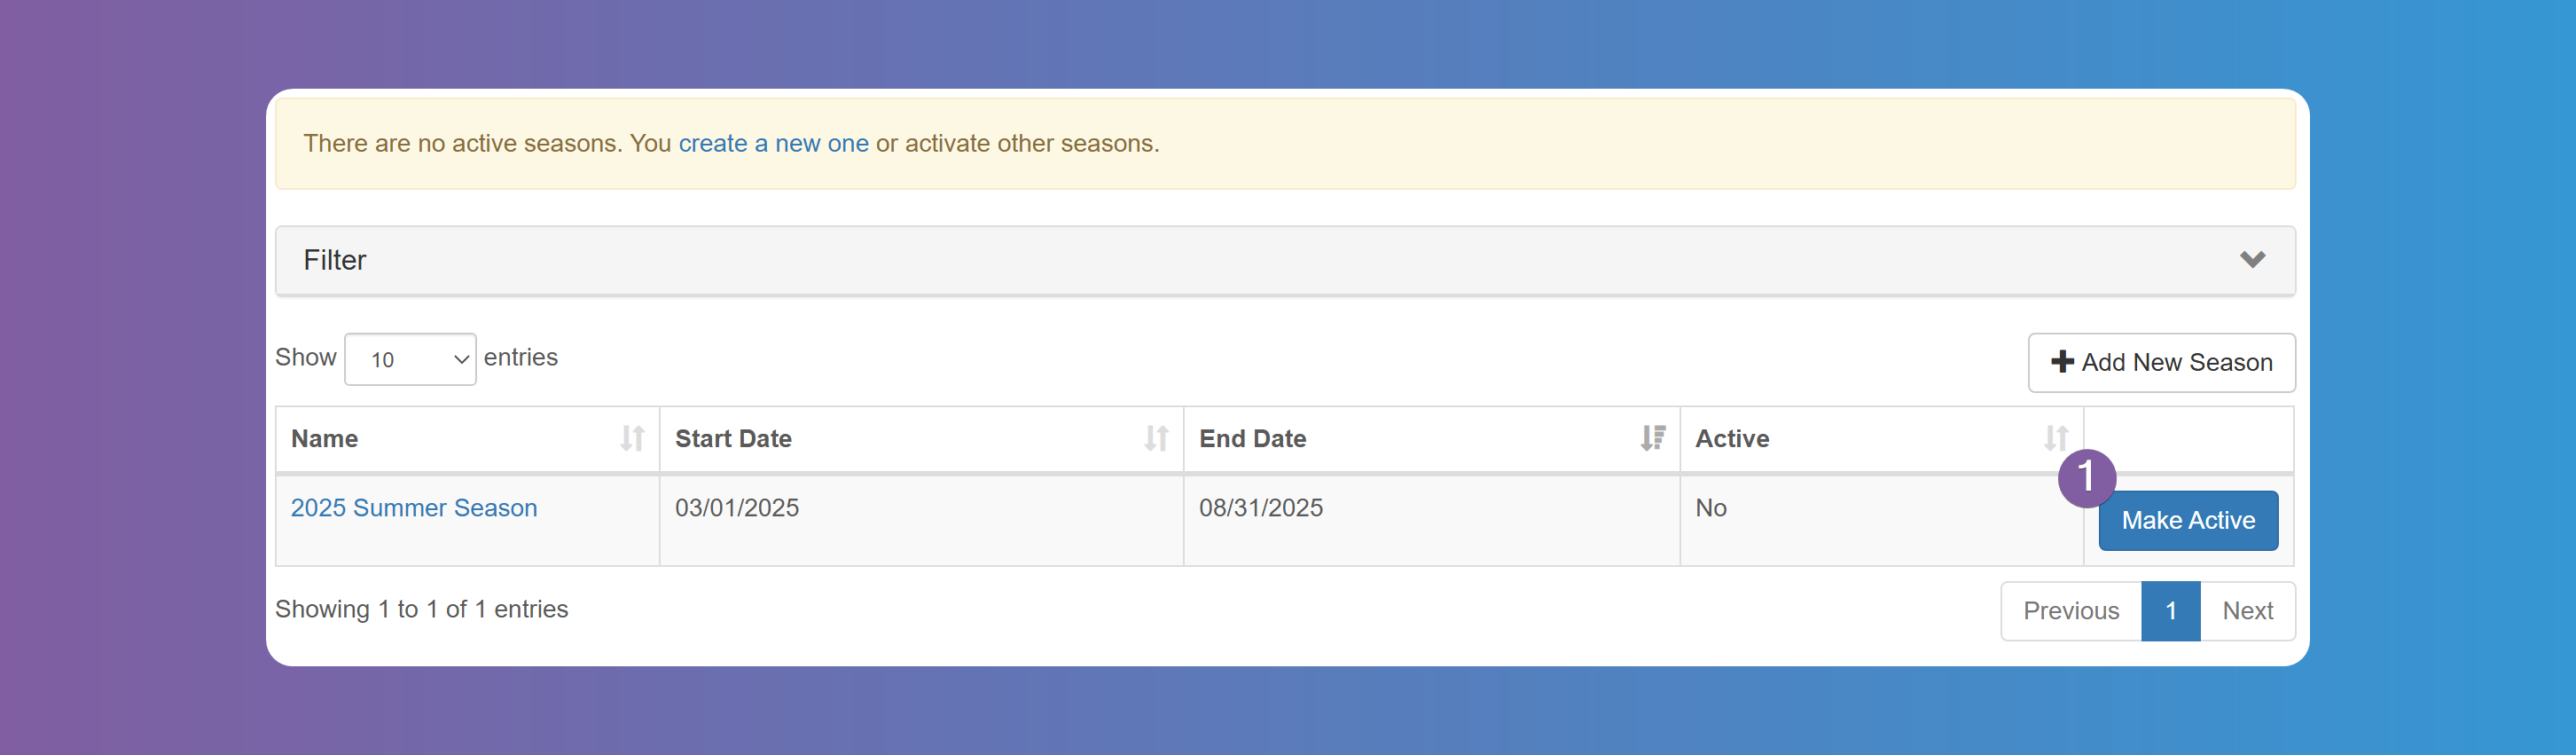
After you have added the Season, you need to make it active by pressing the Make Active button.
You can only make a Season active as long as the dates are within today's date.
You can have multiple Seasons active at the same time. Some Schools/Districts want to have Seasons overlap so Students can start registering for the next Season while the current Season is ongoing.
5. Other Configurations
Those are the minimum required configurations you need in order to get started, but you will want to configure your instance of GetMyInterns in more details to match your own workflow and needs.
Navigating the Admin Dashboard
The admin dashboard provides a clear view of your internship program at a glance:
- Pending Items: Quickly review students, providers, or offers requiring attention.
- Reports: Access detailed analytics on placements, timesheets, payroll, evaluations, and more.
- User Management: Add or remove admin users with role-based access.
- Configuration Shortcuts: Quickly jump to workflows, settings, and reports from the left navigation panel.
To learn more about specific areas of the dashboard, check out our Admin Reports Guide, System Configuration Guide, and Timesheet Settings.
Need help? Visit the Help Center homepage or contact us at support@getmyinterns.org.